Hello again!
**Normally, I would include everything in one post, but that means I don’t post until I have time to make all the necessary diagrams and bring everything together at once, so for the sake of posting more often I am going to break up this section into multiple parts. For this post, I’ll just introduce the main idea, and then dive into the details more in the next post.**
I apologize once again for how long it’s been since the last post, but fear not, the Immortal is still being worked on. This has been a very difficult year for me for a number of reasons, and I haven’t had as much time to work on this as I would have liked, but I did have enough time to finally sort out a few important pieces of the screen rendering pipeline. The result?
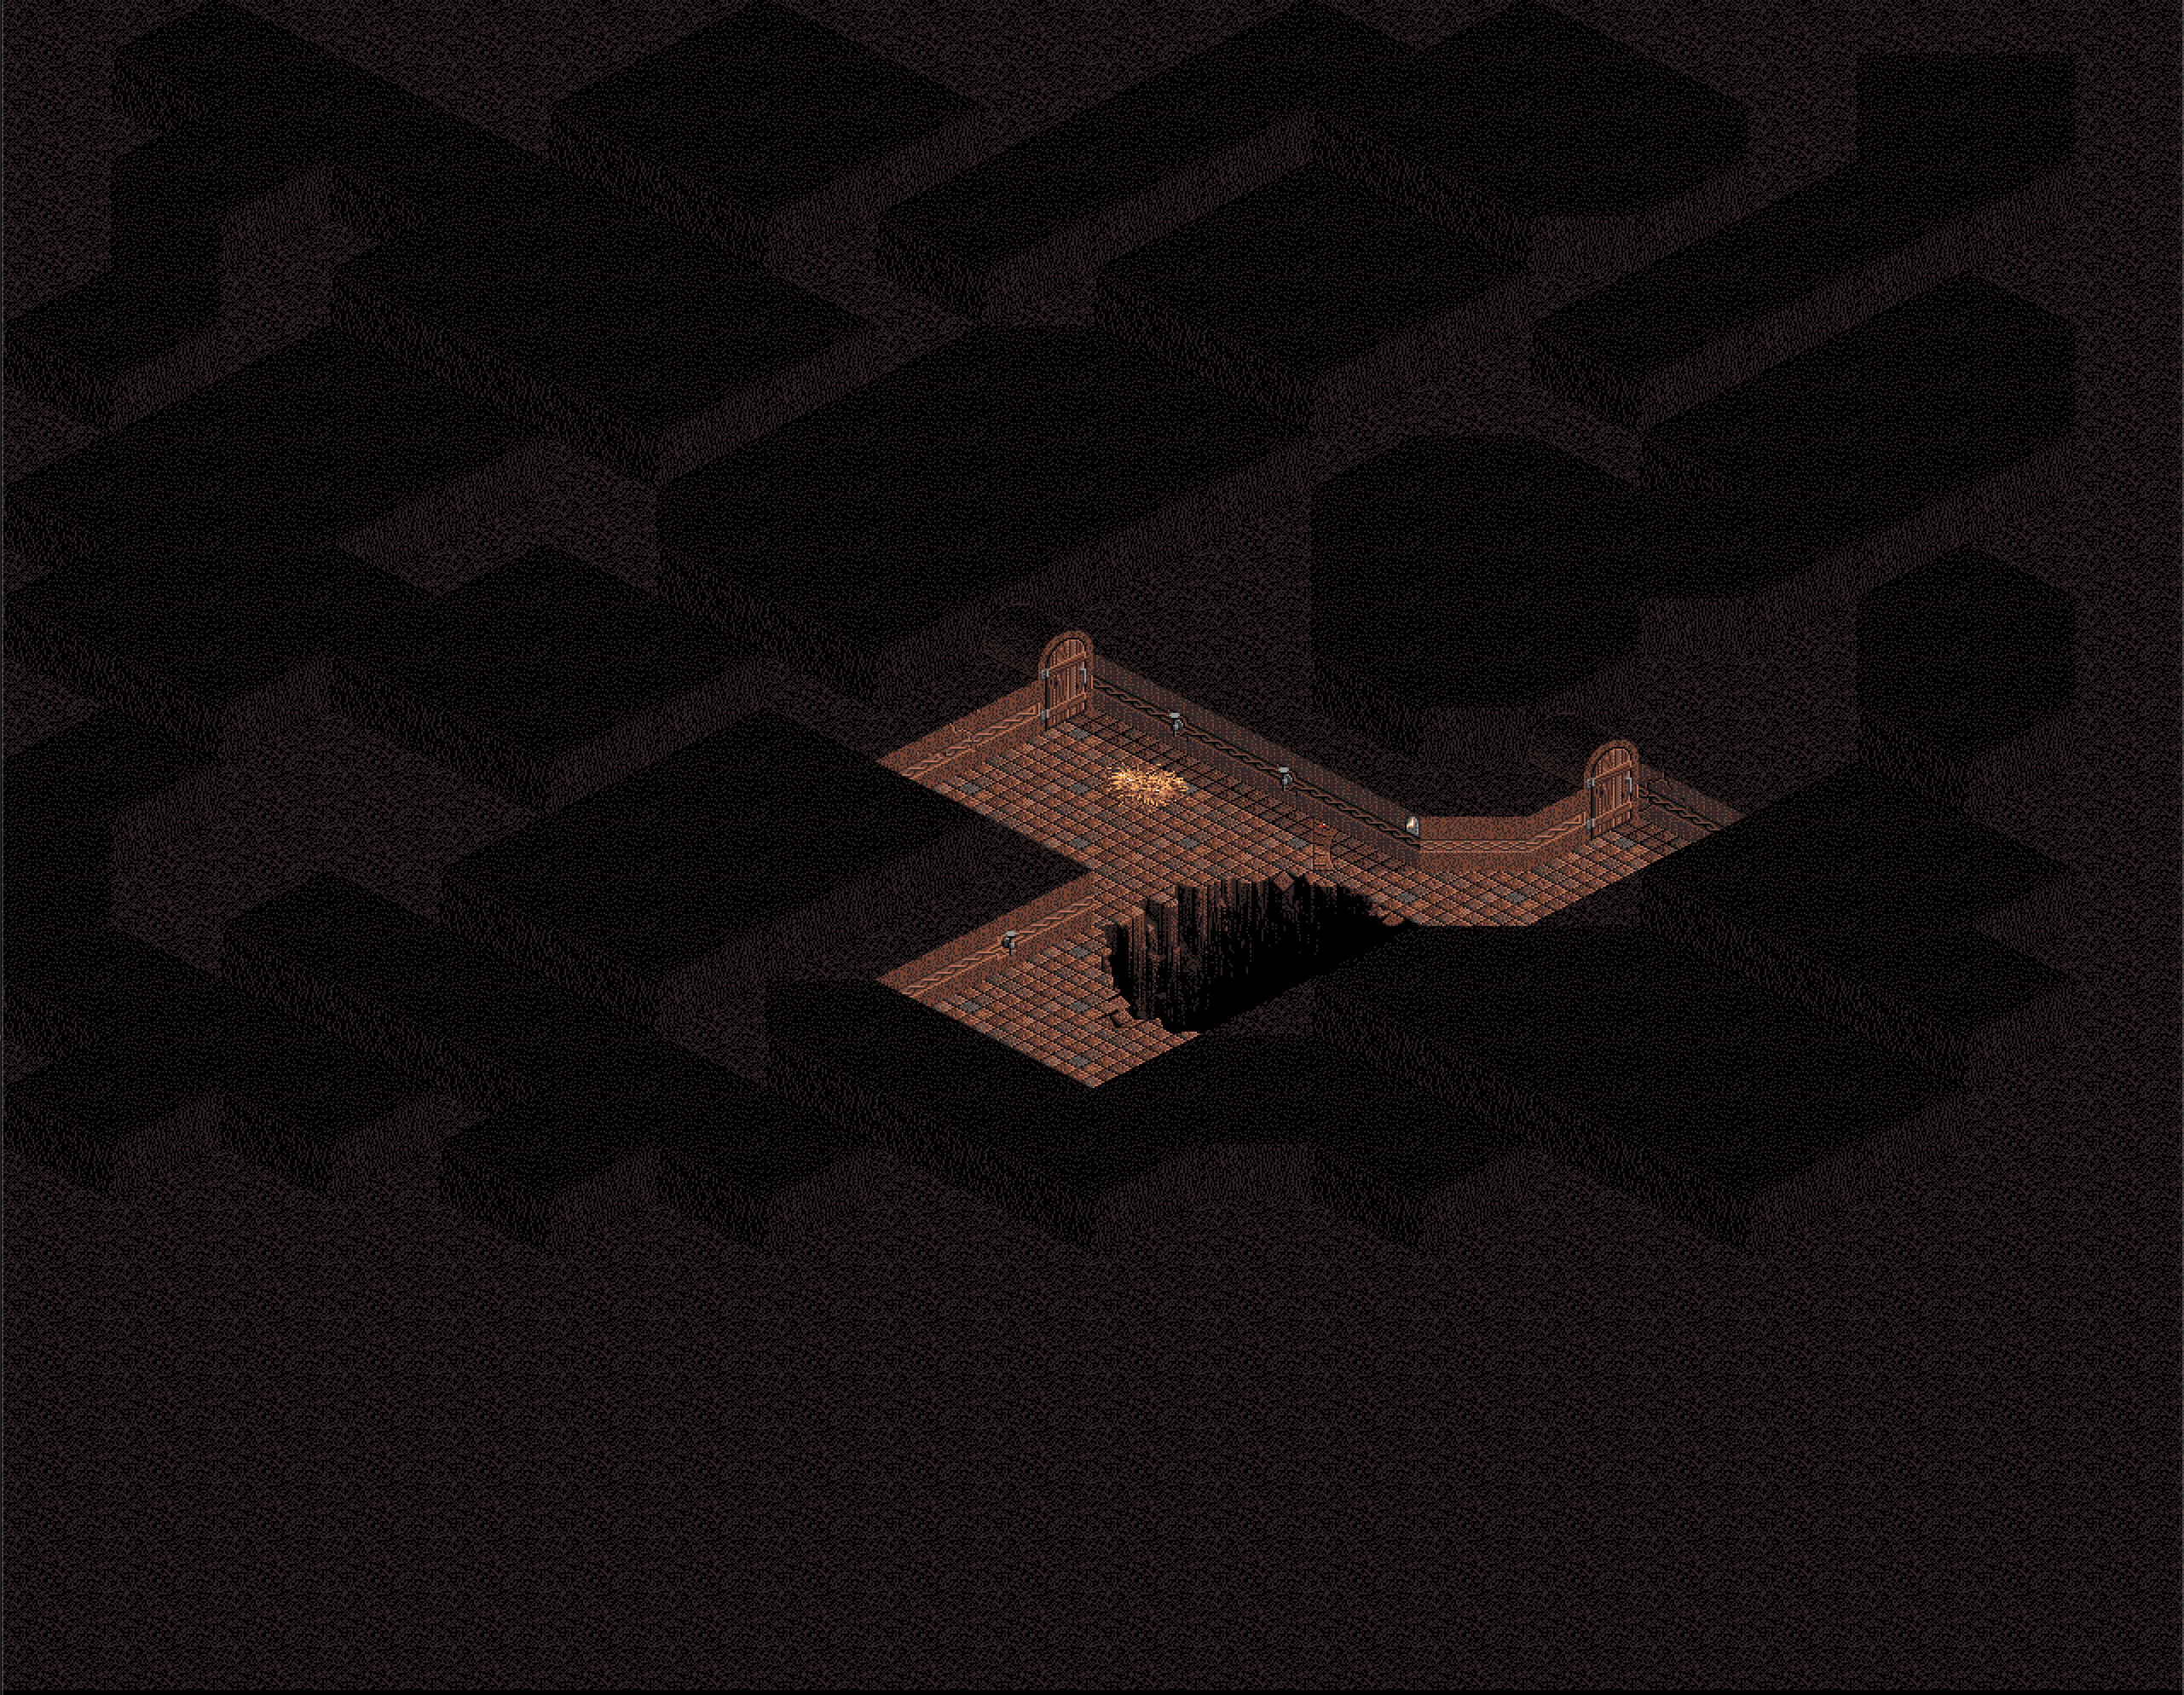
The level covering system works!
You might also notice that this screenshot is of the entire level, not just the viewable screen portion. I have temporarily increased the resolution of the screen buffer to allow me to view entire mazes at once. This has been very important for understanding how the rendering pipeline works, but we’ll get to that later. The other thing increasing the resolution allows me to do, is output screenshots of the full level data for the game. This is useful not just because it lets me confirm things about the data loading, but also because I have not been able to find any proper maps made of the original Apple IIGS version of the game. So enjoy the full maps of the game below:
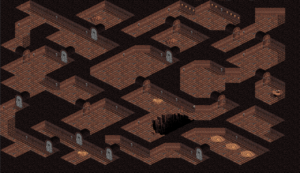
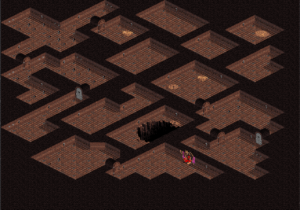
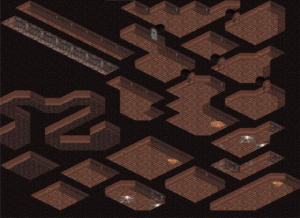
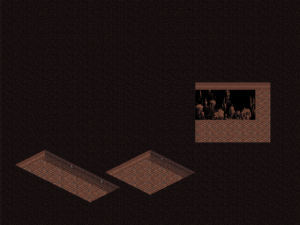
The thing to note about these maps however, is that they show all of the rooms at once (and they also don’t show things like ladders and traps, which are done with sprites). During the actual gameplay, you only see the room you are currently in, even if the screen is scrolled such that an adjacent room would be visible. Normally, this might be done with a simple dark filler tile for anything outside of the room, but this game actually does something quite different. The tiles that are seen outside of the current room actually reflect the shape of the room they are covering. In this way, it appears from inside of one room, as though there is a higher or lower ceiling in the adjacent room. Whether this was a choice made due to a desire to not have to load each room individually, or simply because it looks kind of neat, is hard to say. Either way, this presents some challenges in rendering the screen at any given point. To show what I’m referring to, we can use the NES version as a reference, because that version does in fact just use a black filler tile for everything outside of the current room.
(NES on left, Apple IIGS on right)


As you can see, in the Apple IIGS version (and most of the other ports of the game in fact), the filler tile is different depending on what it is supposed to be covering over. Whereas in the NES version, it’s just black filler.

This may not seem like much at first glance, but it ties into the way this game loads and displays levels in general.
The pipeline
Okay so, how does this game render the screen? That’s always a big question in games like this where the engine is entirely bespoke and running on limited hardware, but even considering that, this game is a bit weird. I’ll try to break it down fully in the following posts, but to start with let’s review what we know from previous posts:
- The screen border (the stone with patterns on it that frames the gameplay and shows the health bar) gets drawn first and is simply transferred directly to the screen buffer byte for byte
- The heath bar is made of sprites
- The text is rendered as sprites on a black background
- Individual tiles are rendered through a clever process of dynamically generated code blocks that transfer individual pixels to the screen buffer
- Sprites are drawn through a somewhat unique process of indexing an unrolled loop and uses a masking table to handle transparency efficiently
- The sprites and certain tiles are sorted by priority level before drawing
We also know a few things about the data structures used to define the level:
- Each level contains two files, maze.unv and maze.cnm
- maze.cnm contains the Logical CNM
- maze.unv contains the universe properties, the CNM, and the CBM
- The LCNM is not compressed, but the CNM and the CBM are both compressed together
- Using the CNM, the LCNM, and the CBM, the game dynamically generates micro routines that move pixels directly to the screen and represent tiles, through a process called Munge
- The LCNM contains entries which correspond to the cells of the CNM, and define what permutations of a given CBM tile (by way of the CNM tile number) are needed for the level
To expand on the last point, the way graphics and level data work in this game is a little different from what you might expect. Basically, for a 2D game to display level data, two methods come to mind:
- Store the entire scene as a single contiguous set of data and load an entirely new scene whenever needed
- Split up the scene into unique, reusable ’tiles’ that are put together like a puzzle to create the given scene
If you use the first method, you often need a lot of space to store all of the graphics, but it’s simple to load each scene. If you use the second method, then you can save space by only storing the graphics that are unique within a scene. However, you then need a system that uses a data structure referencing those unique tiles so that the game engine knows what graphics to draw at each point in the screen. There’s another wrinkle though, which is layering. If you want some tiles to have partial transparency so that you can layer tiles over each other, then you need an intermediary data structure to handle permutations of a given tile. This is also useful if you want to make larger tiles out of smaller chunks of graphics data, however The Immortal does not do this, it only uses permutations for layering.

You may be wondering, why does it need layering on non-sprites if the machine does not have distinct layers which can move independent of each other? The answer is two-fold. Firstly, even without hardware based layers, this game has a foreground and a background, such that objects and monsters can be drawn behind some parts of the scene and in front of others. This requires some system of layering. Secondly, the tile covering system often needs to arbitrarily combine halves of different tiles, ie. a ceiling tile covering half of any given background tile.
So, does this mean that The Immortal has an intermediary data structure for tile permutations? Well, sort of. This game does make a distinction between raw graphics data, and final tile data, but it’s not as clear cut and organized as one might expect.
To put it simply, what we learned last time was that the game looks at every tile in the CNM and, using the equivalent cells in the LCNM, creates tile data in the form of micro routines that represent the needed permutations of a given tile. Since it checks every tile in the maze, it creates every permutation that the level will require. Although in reality it only creates upper corner permutations for covering tiles and lower corner permutations for background tiles. This time however, we’re finally going to discuss the rest of the system
To start, let’s take a look at the general flow of functions related to drawing the screen:

So what we can see here is that the game will always go through Logic and then DrawUniv, where Logic sets up what needs to be drawn, and then DrawUniv draws the screen. At the start of a level, Logic calls LoadMazeGraphics, which loads the universe data from the file, and then it calls LevelShowRoom, which uses makeBlisters with the player default position to set up the level data. If however it is not the start of a level, but the player is trying to move through a door, then the game will once again call LevelShowRoom with the new player position. In all other situations, it will just call LevelDrawAll, which decides what objects and other sprites need to be drawn, without touching the level data. After logic has decided whether or not to change the level data, DrawUniv will put together just the current screen based on the scroll position and what sprites need to be drawn.
We can separate the pipeline into two phases: setting up the data, and drawing the current screen. To summarize, to get from nothing on screen to the current frame being drawn, the sequence is essentially:
Load the level files and decompress the data into memory (loadUniv) -> Transform the data into the structures containing: raw graphics, permutations, and level data (mungeCBM) -> Modify the level data to reflect which room is currently being shown (makeBlisters) -> Crop the level data around the viewable portion of the screen (makeMyCNM) -> Draw the background tiles to the screen (DrawBGRND) -> Sort the foreground tiles and the objects/monsters/sprites (sortDrawItems) -> Draw the foreground tiles and the sprites in order of priority (DrawItems)
Next Time
Alright, that’s all for part one of the screen drawing explanation, in the next post we will get into the more complicated parts and talk about how that covering system actually works.
Thank you to everyone who has kept up with this port, and I am sorry again for how long it sometimes has been between posts.