ResidualVM: Week 3

Time flies, isn’t it?
This week’s focus is on the save & load menu. Similar to the settings menu, the most important part of implementing the save & load menu is to implementing the widget that shows the save data.

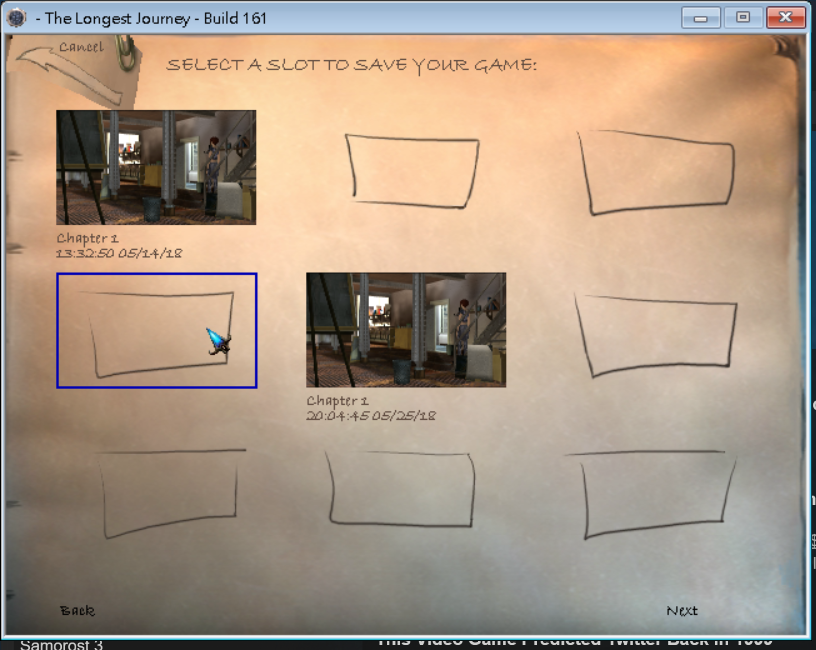
I created a new class called SaveDataWidget for this purpose. A SaveDataWidget consists of three parts: the screenshot thumbnail, the text, and a blue outline that shows up when you move the mouse on it.


The save menu of the original game

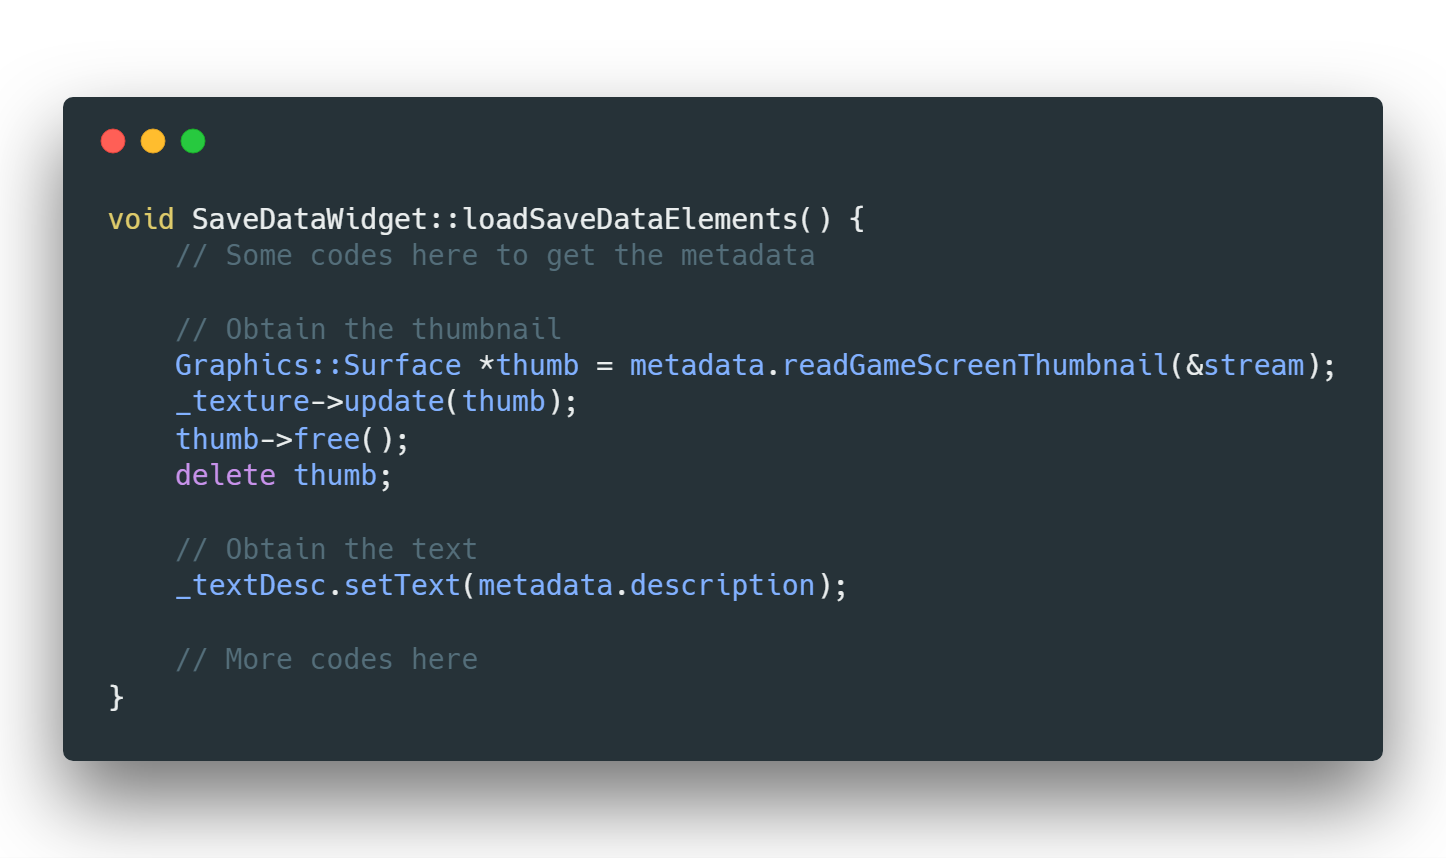
The thumbnail and (most of) the text are already saved in the original save data. All I need to do is to extract them out and properly store and render them. The thumbnail will be read as a Surface, which will then be bound to a Texture and then got rendered by a SurfaceRenderer.

Load the content

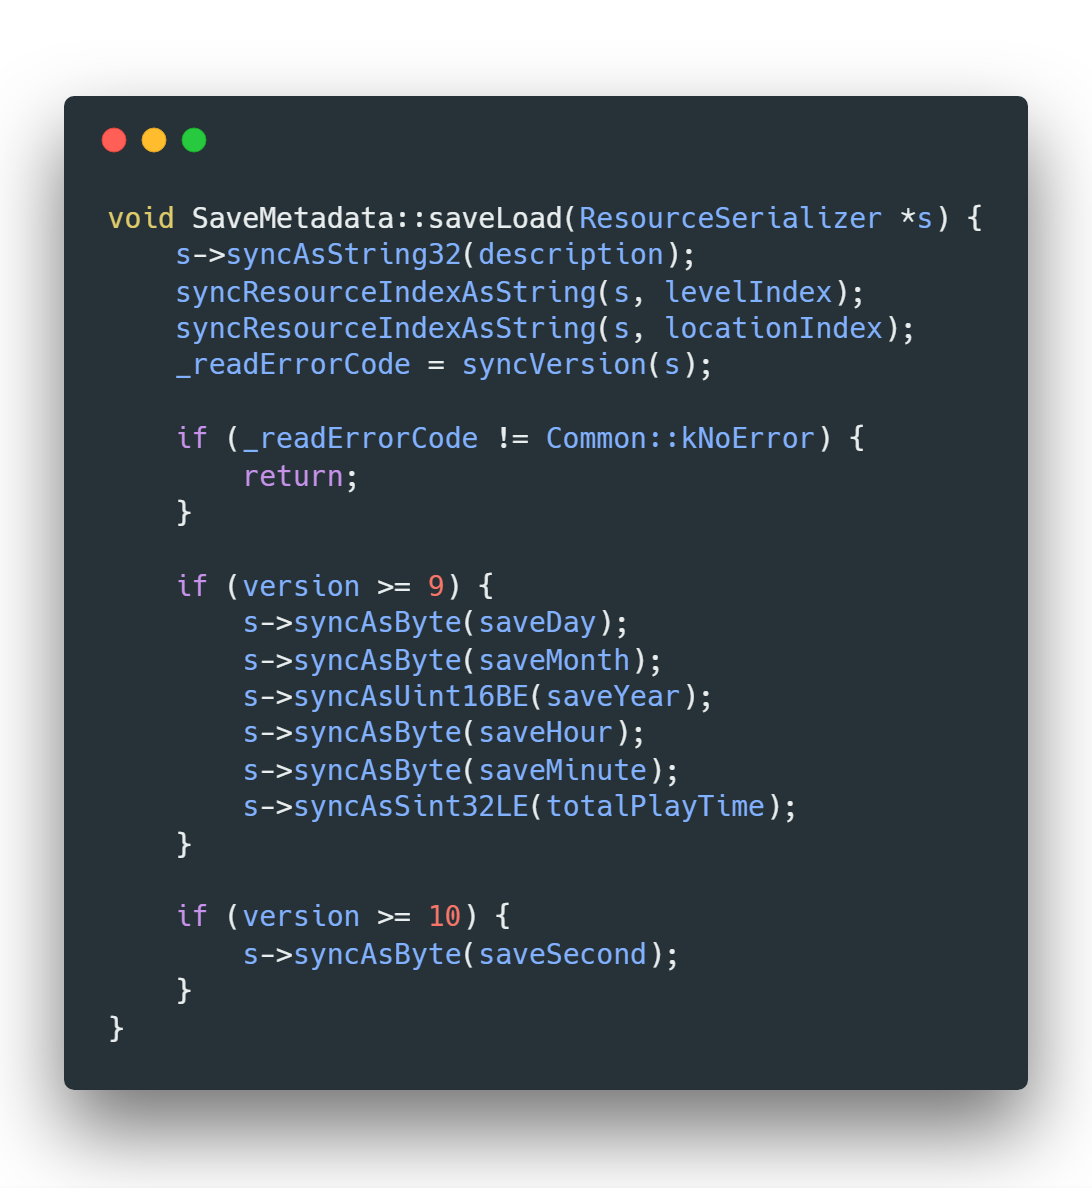
The text further consists of two parts: the title of the chapter and the saving time. The title will be saved and loaded through the description field of the original save data, while the time is already saved in other fields, well, almost. The original version of the save data lacks the “seconds” part, which needs to be added on. For this reason, some version checking needs to be done so as to preserve the compatibility of old save data.

Version checking in the metadata

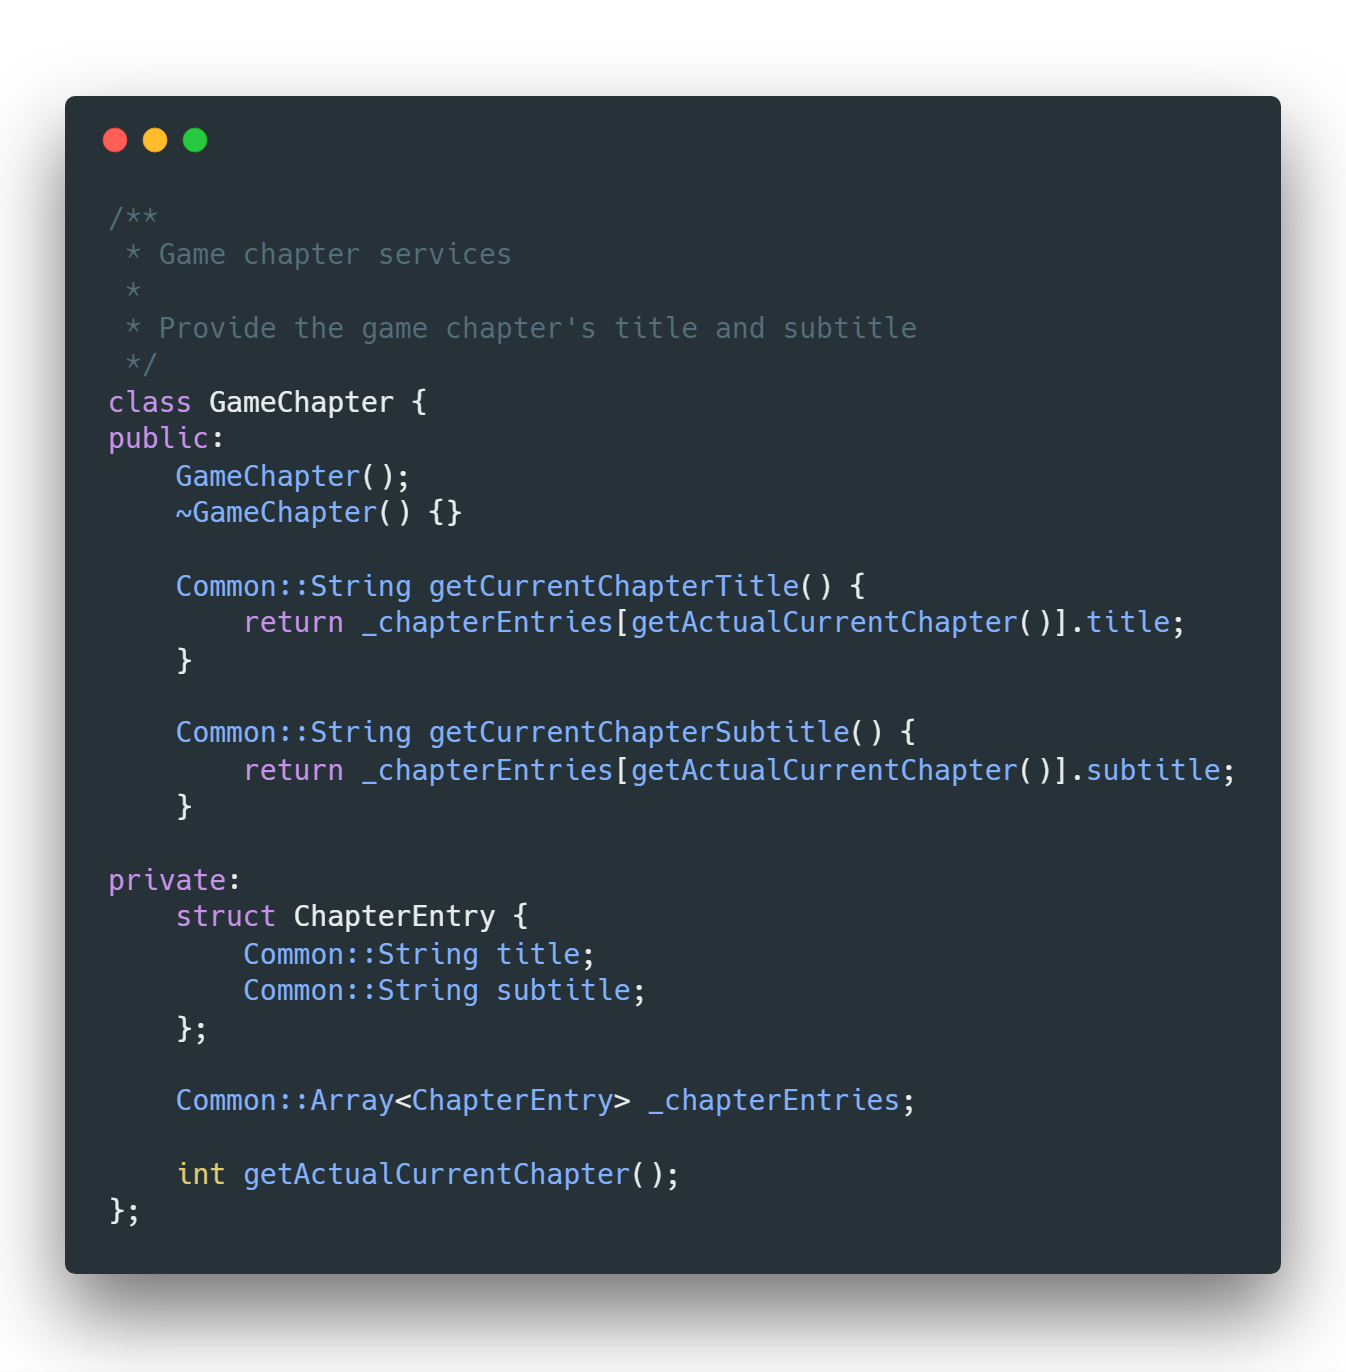
Since the titles of the chapters will be stored in the save data as well, there needs a way to obtain them. It cannot be hard-coded since there are versions of The Longest Journey that are in different language (like French, the language of my best mentor bgK). In the game’s data, names of the chapters are all stored in the file called “chapters.ini”. For a better modularity (and because I foresee the need from the conversation dialogue), I created a new service called GameChapter, which loads all the chapters’ name in the beginning and provides them to other entities when needed.

The GameChapter service

After all these were done, the rest of implementing the actions performed by widgets were trivial. The save menu and load menu use the same location for resources, so they are greatly benefited from the use of inheritance.

Very soon, the The Longest Journey on ResidualVM shall fully support saving and loading through its original menu!

For the detailed development of the codes, please refers to the pull request on GitHub.
All code images are generated through Carbon.

ResidualVM: Week 2

This week’s main focus is on the settings menu, the menu that I deemed the most complex one before. Well, it is indeed complex, but the overall development process was again better than my expectation. Wish I can keep this good start along the way…
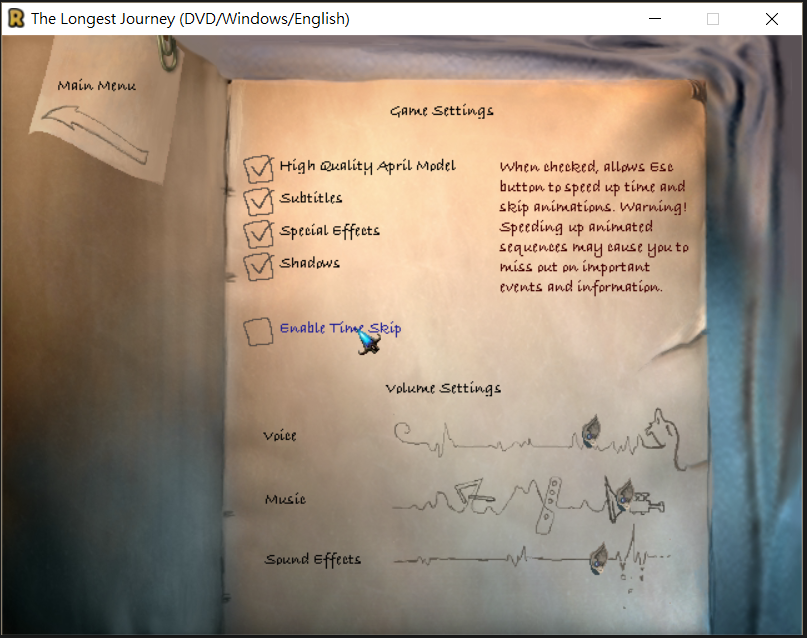
So, the settings menu. The first things to do is, of course, to get all the widgets rendered on the screen. The basic part is identical to how the main menu and the diary index menu are implemented. Dump the game data, load them with class StaticLocationWidget, and they are in position.  But the settings menu have some other bothersome things. It contains two special widgets: checkboxes and sliders. These two widgets are not stored in the place where StaticLocationWidget reads resources and they behave differently.
The settings menu, see the checkboxes and sliders?
One natural idea is to reconstruct the class StaticLocationWidget, making it a more general base class to handle all situations. But that would be a large task, and somehow unrealistic. The base class of any menu, the StaticLocationScreen class, heavily based on the API of StaticLocationWidget. If the mechanism of StaticLocationWidget is changed greatly, a whole bunch of codes need to be modified.
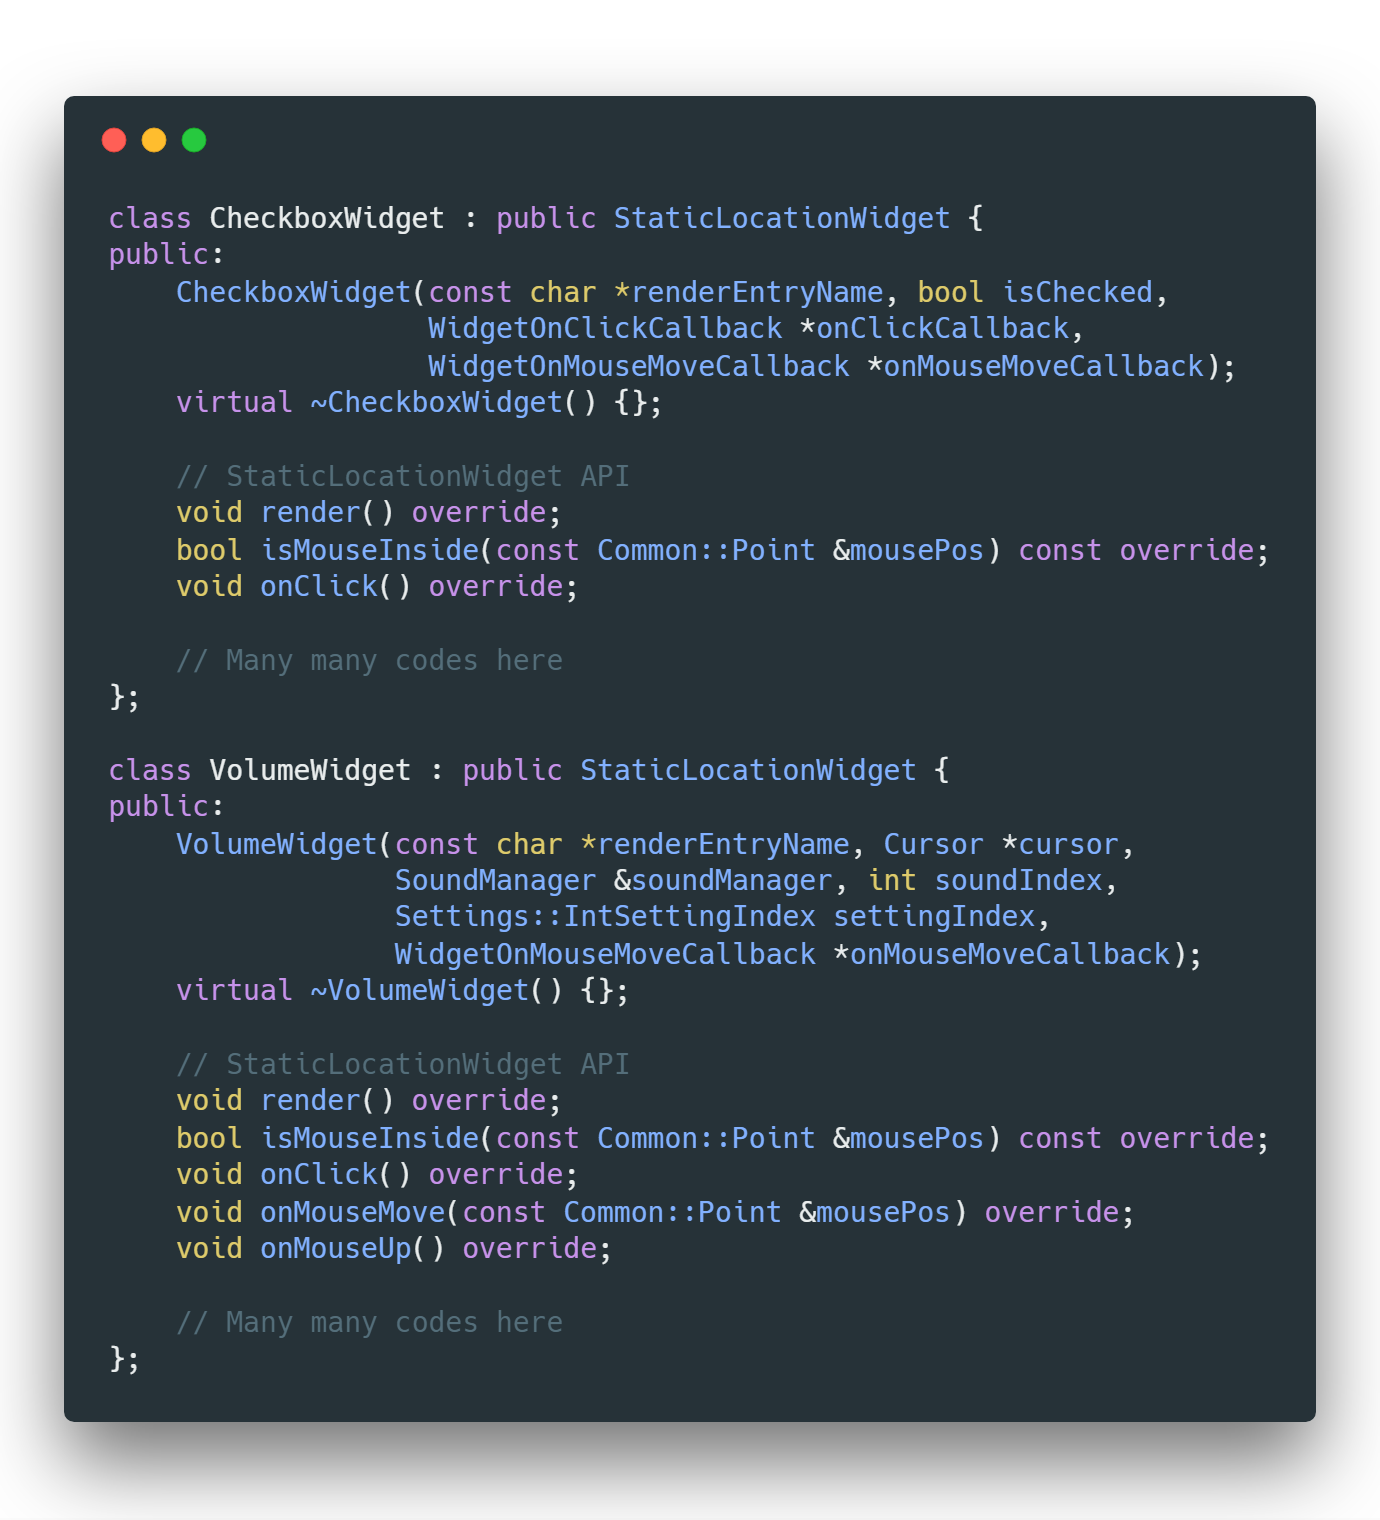
So after thinking, plus noticing the fact that each checkbox or slider is accompanied by a text, which is loaded through StaticLocationWidget, I decided to further extend the class StaticLocationWidget, wrapping the checkbox and the slider and bind them with the corresponding texts. The class StaticLocationWidget still needs to be modified to allow virtual calls, but the change in the overall architecture is at its minimum.

Checkbox and Slider
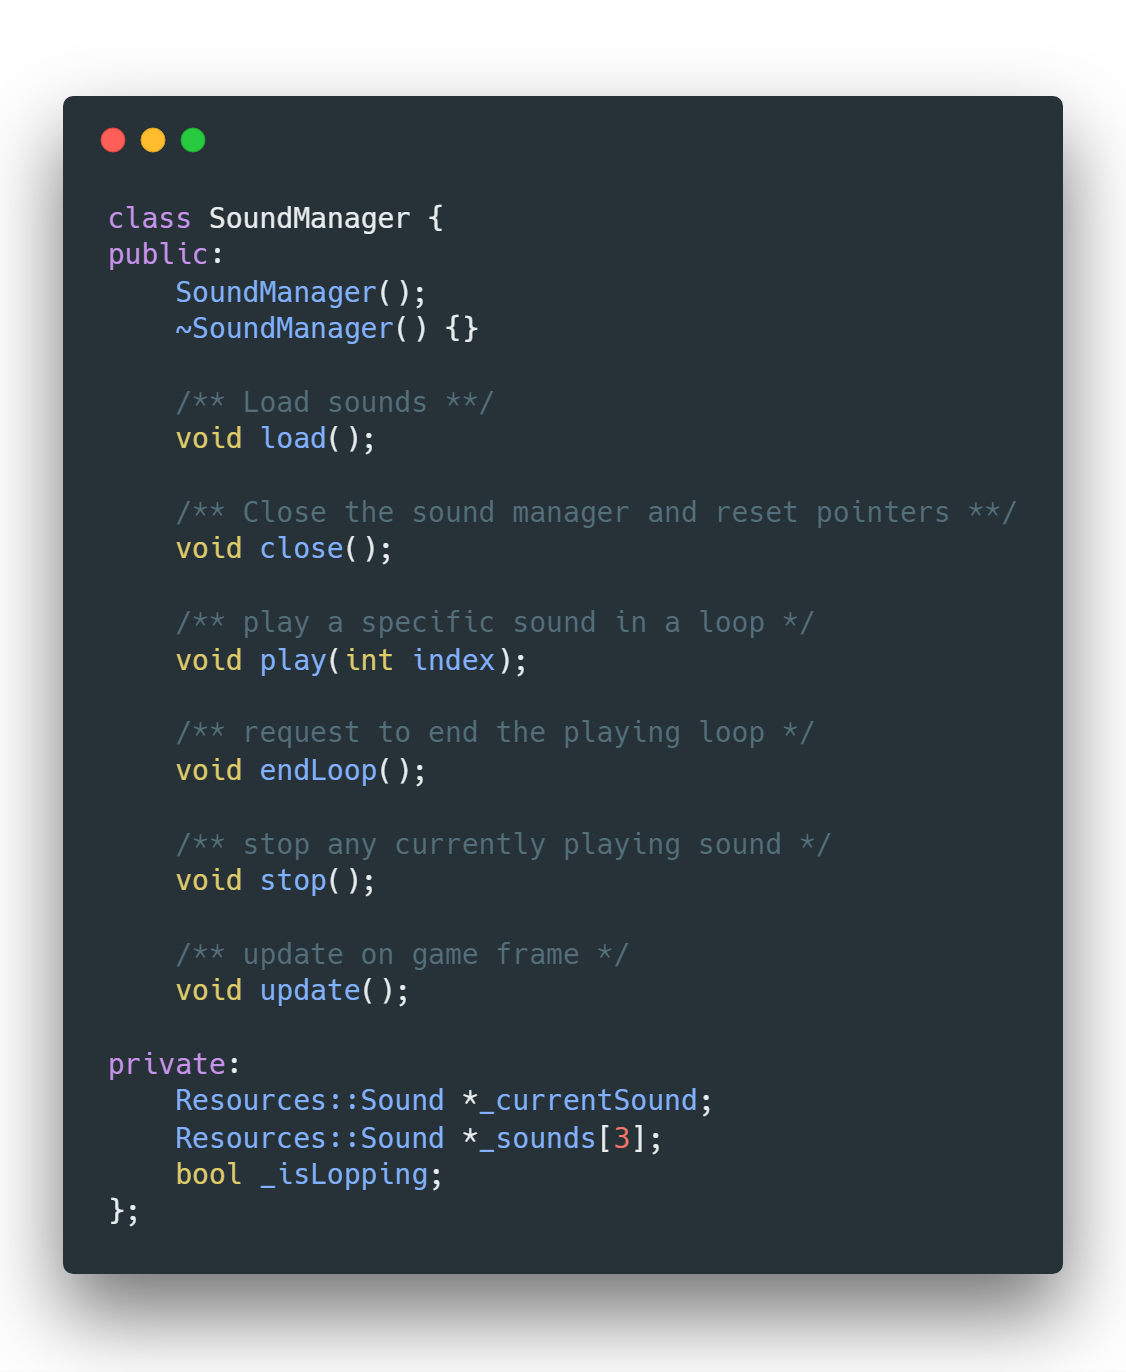
Additionally, the slider’s behaviour needs to be handled specifically. Firstly, it supports an action that no other elements in the game support: being dragged by the mouse. This is achieved through handling the “mouse down” and “mouse up” event. Secondly, when the slider is dragged, it will play a sound in a loop but when it is released, the sound will not stop instantly, but plays its last round. This is handled by an additional class called SoundManager, specifically designed for the slider.

The SoundManager
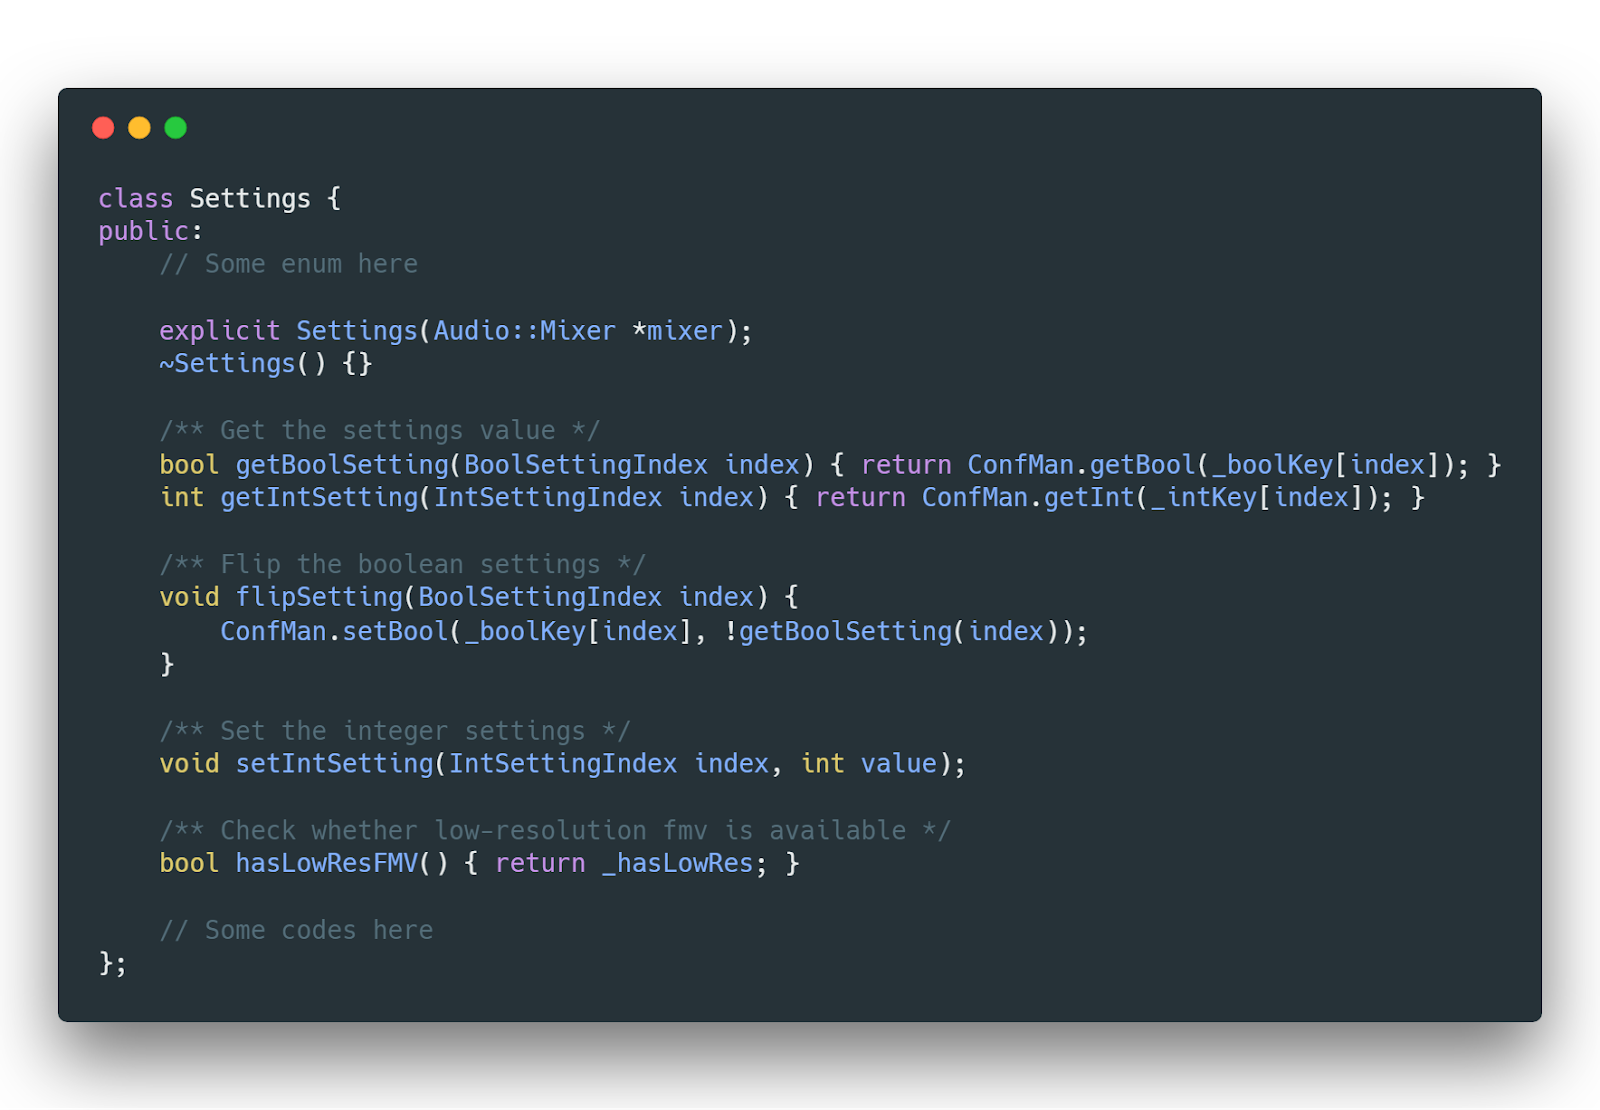
After all the widgets are properly rendered, it is time to actually enable those settings. Since game’s setting data may need to be globally accessed throughout the game, I utilized the Services class and created a new service simply called Settings. It is its responsibility to record all the settings value, synchronize them with ResidualVM, and provide globally accessible interfaces for related entities to query settings.
The Settings service
And that is the basis of how the settings menu works. Next week I plan to focus on the save & load menu. Hope everything goes well 😀
For the detailed development of the codes, please refers to the pull request on GitHub.
All code images are generated through Carbon.

ResidualVM: Week 1

Well, I guess the first week is the week that you learn the most.
For the first week, I decided to tackle the main menu of The Longest Journey, for the reason that the main menu can largely improve the experience of playing the game and many components of the main menu can actually be linked to the future diary menu within the game. Due to its complexity, I never intended to implement the whole main menu out within a week. I planned to build a basic structure of it, got something on the screen and then I can move on to other parts based on the built foundation. So far, the outcome is, surprisingly, better than I have expected.
That does not mean I didn’t encounter difficulties. Right at the beginning, I found myself messed up in the different versions of The Longest Journey game data provided on the market. I got my game from Steam, and it turned out that I need to install two extra libraries to let ResidualVM fully support its different sound format. Have to say, using Windows is really not the best choice for installing loads of libraries. I used to have few feelings towards Linux system but now I understand why the opensource community loves it.
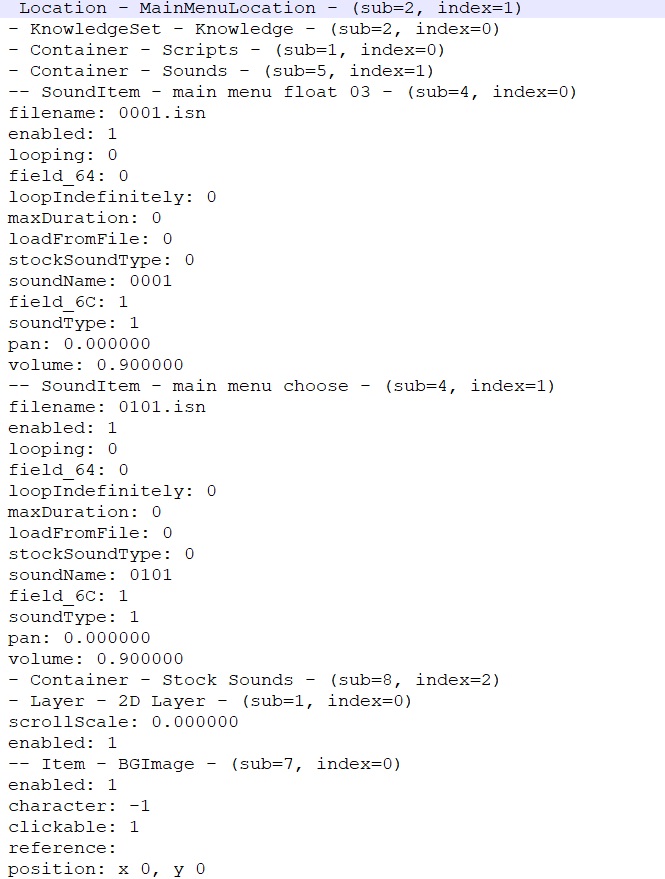
So, the game could run on ResidualVM now, and the first step was to get all the resources related to the main menu loaded and rendered on the screen. Thankfully the code base has provided a class called StaticLocationScreen that handles related works. A new class called MainMenuScreen derived from StaticLocationScreen was then created. The next thing I need to get to make the resources, or to be more specific, the widgets of the menu rendered on the screen, is to get their name from the loaded data. By using the debug mode, I was able to dump the list of resources of the location referring to the main menu here, where names of items (widgets here) were shown.
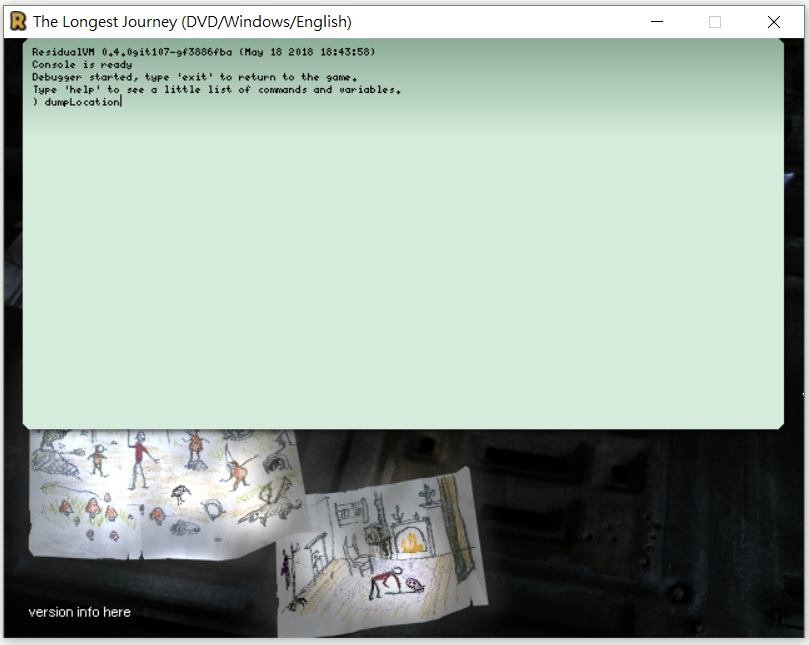
The Debug mode of ResidualVM

Part of the dumped list
Once I got the list of names that I needed, I could load them as widgets accordingly, as what a StaticLocationScreen would have expected. Furthermore, each widget may have two handlers for clicking and mouse moving.
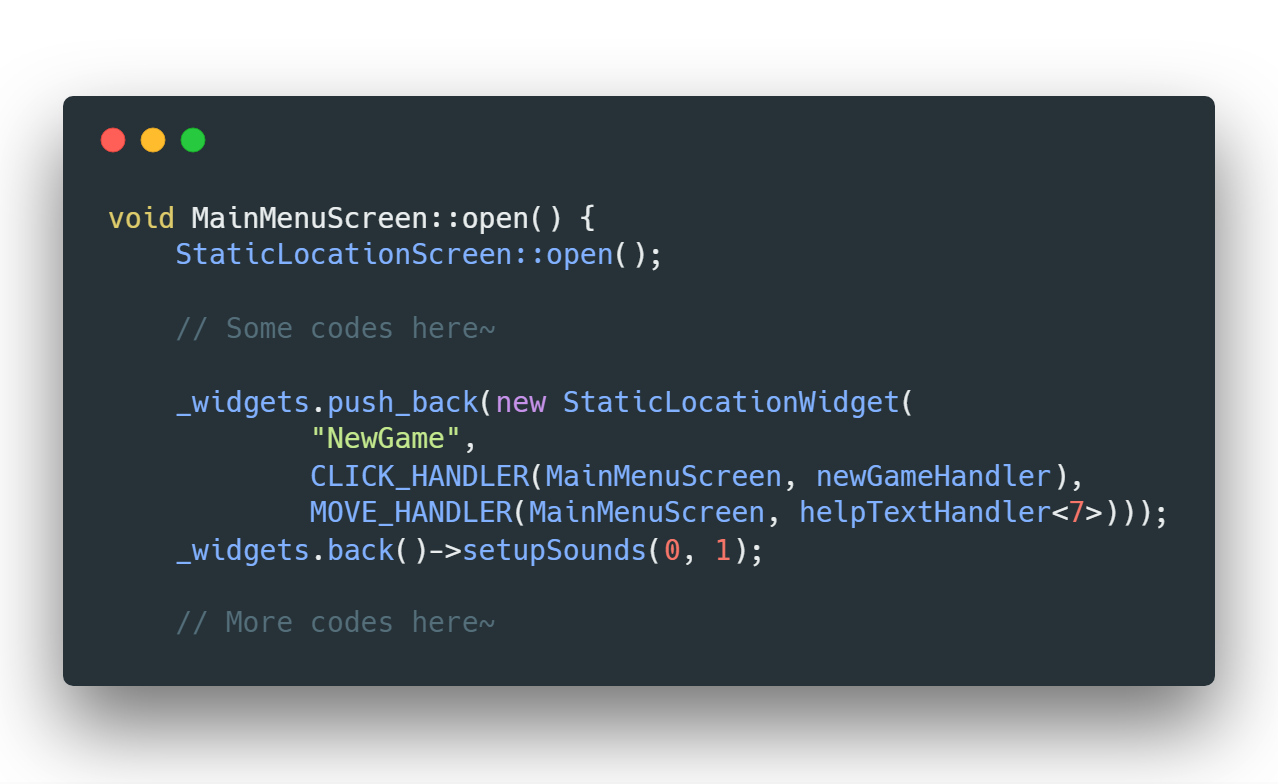
Load the widgets
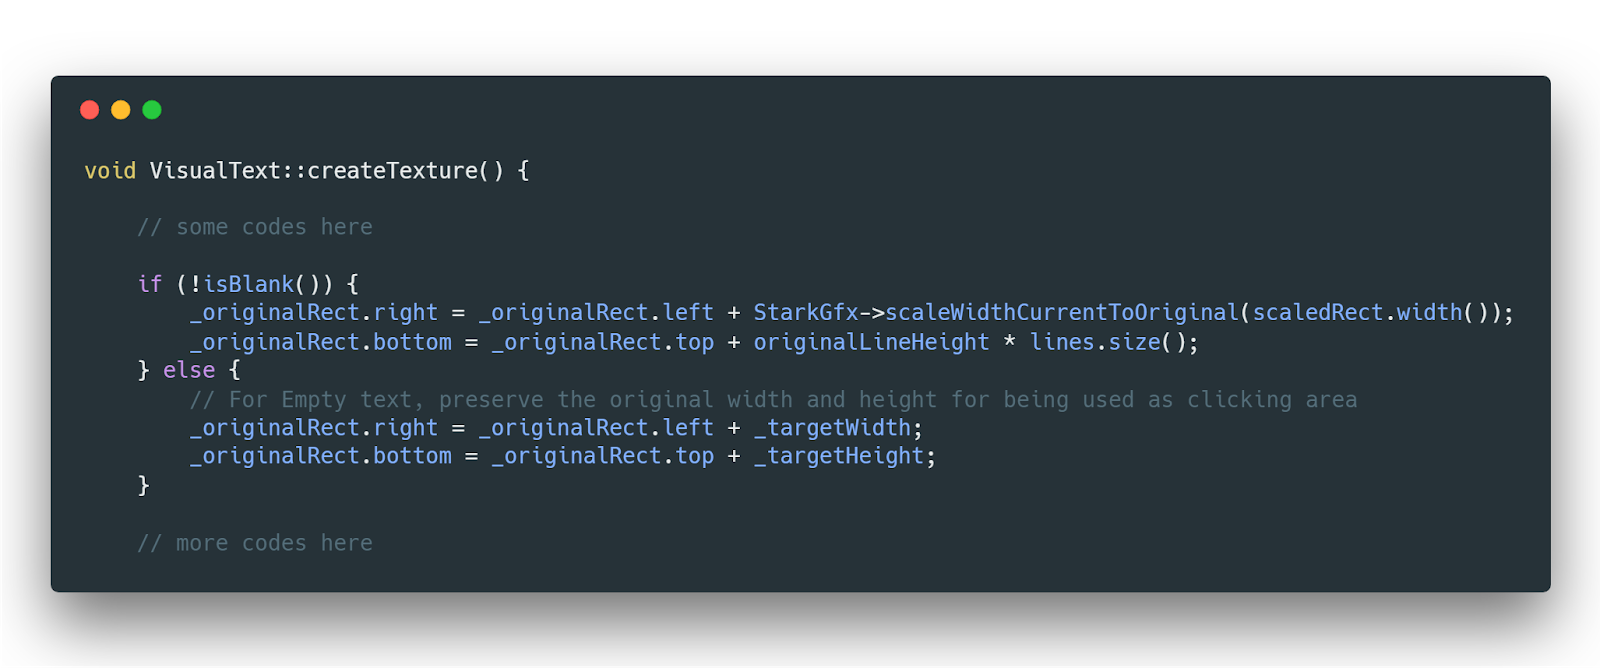
That is the overall design of a menu, but things not always go easy with you. In the main menu, each button widget is related to a separate text that will show when you put your mouse on it. Well, the problem was that the clicking area of the button is determined by an empty text with an extra large rectangle size. However, ResidualVM would recalculate the size based on the content of the text, causing the clicking area to be extremely small. So the way of calculating the size needs to be changed.
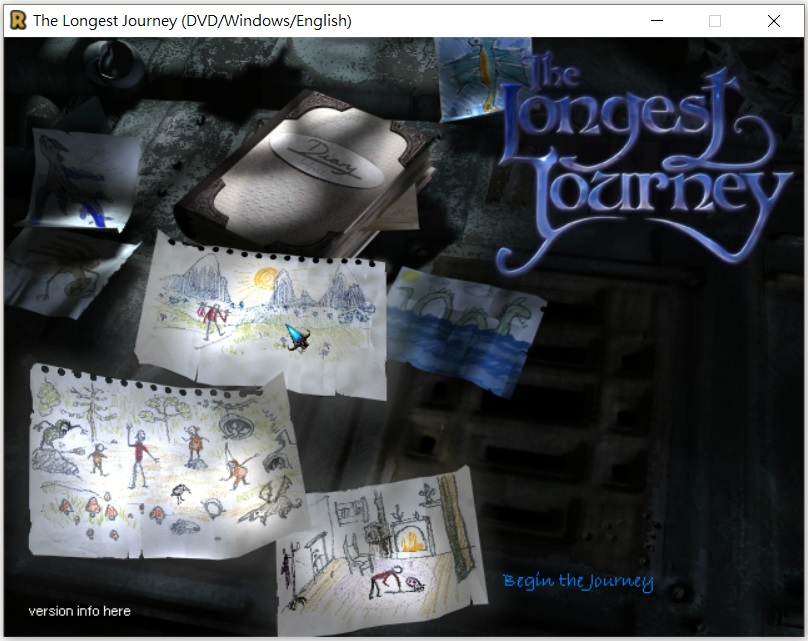
See the help text on the right-hand side?

The special code for the blank text area
After tackling this problem, other things become clear. Just write different handlers for different widgets. The NewGame button needs to open a new game (based on the version, demo or not), and the Credits button will play the credits video. Oh yes, talking about videos, the game also needs to play the video of FunCom game company before the main menu, which was done through cooperating with the class UserInterface.
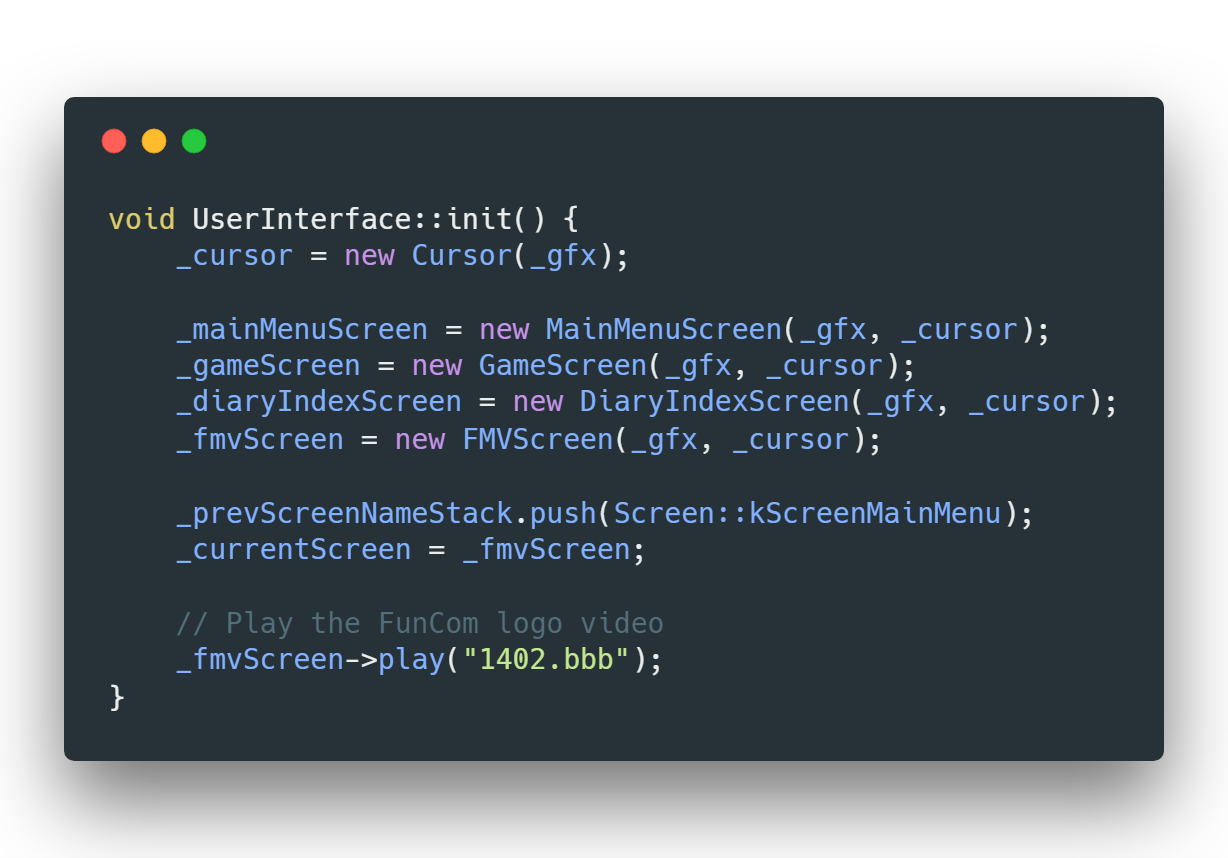
How things are loaded in the beginning

Up to now, everything seemed to be fine, until something unexpected showed up. In the original game, when the user clicks the button, the clicking sound is ensured to be played completely. The game behaves to be frozen until the sound is finished and carries on doing what it should do. Right now It seemed that changing the screen in UserInterface will cause the playing sound to stop.

I originally tackle this with an empty while loop, busy-waiting for the sound to stop. But obviously, busy-waiting is not a good thing to show up in a game design. Therefore, I started the biggest commit of this week, covering 9 files with more than 100 lines of code modified, to queue the request of changing the screen. As you can imagine that was really a mess, and it just doesn’t feel right to change so many things just for a simple and short clicking sound. In the end, after discussing with the mentor, we decided to just add a delay in the while loop to free the CPU for a while. That seems to be the most appropriate solution for now, apart from the fact that my biggest commit got discarded.
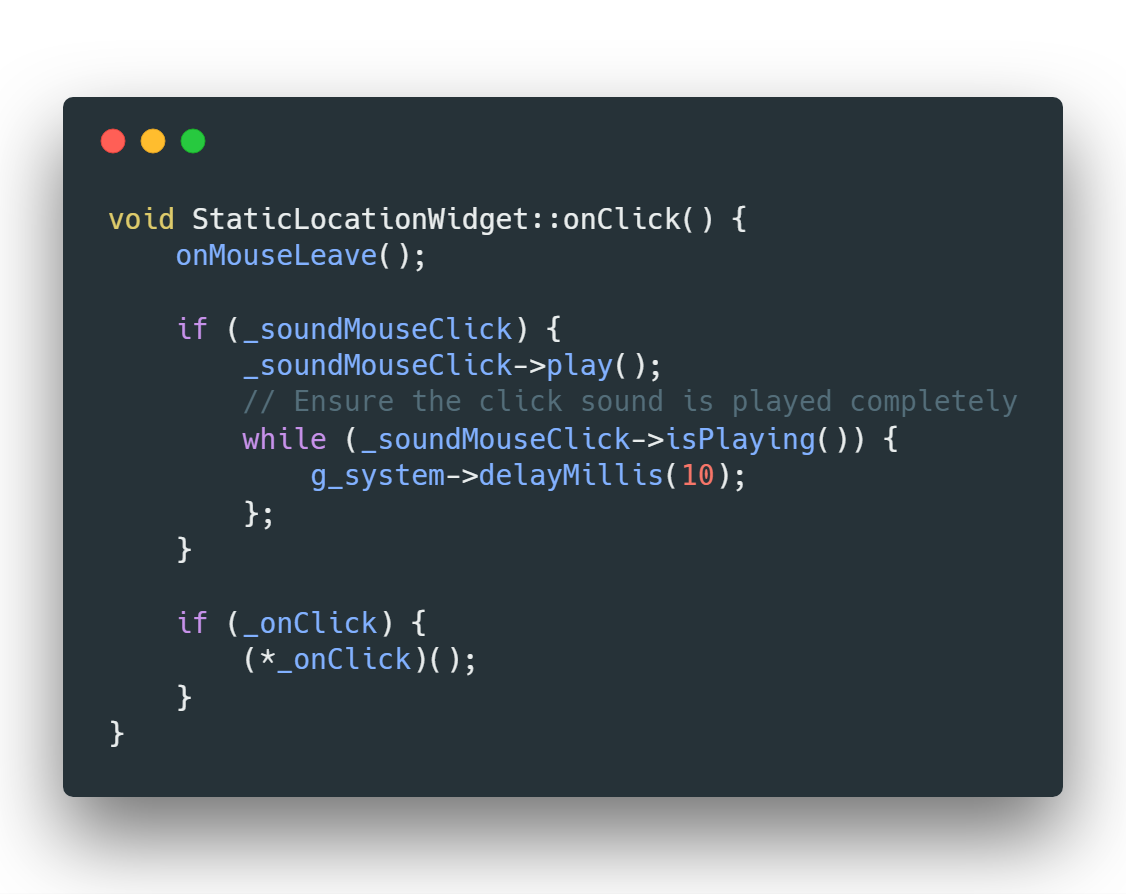
Bothersome clicking sound

Well, that basically covers up the most essential part of this week. Now the main menu has some basic functionalities to support the game. Although there are difficulties encountered, overall speaking, seeing that the main menu is coming to a shape has given me much joy. I’ll keep on working and I am looking forward to next week’s tasks.

For the detailed development of the codes, please refers to the pull request on GitHub.
All code images are generated through Carbon.
ResidualVM: Let’s get started

Well, I didn’t expect that making a blog will take my whole afternoon away. Making a good look on Blogger is really not that easy. I think I need to better strengthen my skill of choosing typefaces…
Ok, not the time for nonsense. So, I am going to take my first Google Summer of Code project. As a long lover of game programming and development, I am so happy that I got accepted in the project of ResidualVM, a 3D game interpreter for old PC games. I don’t have actual game programming experience before and now I finally got the chance to see and feel (and potentially mess with) an actual game engine. I am really excited about what will I experience in the coming three months of working.
Well, for the project, I am going to further improve and develop the Stark engine within ResidualVM, which is the game engine for interpreting the game The Longest Journey. To complete the project, I am going to implement the game menus and the shadow feature. The menus part doesn’t seem to be that difficult, apart from keeping further reading the codes, while implementing the shadow may be a challenge since I just have so so so so so little knowledge about computer graphics. But no matter, I am ready for challenges. Besides, I got the news that the teacher teaching computer graphics in my university is terrible so for the sake of my GPA, I am going to learn computer graphics on my own anyway. Isn’t it a great way to learn through taking part in a real project? What? Just don’t learn computer graphic? Is that an option for a game developer?
 
I can foresee a busy summer is coming. Apart from GSoC, I also have an internship in the IT division of Consumer Council in Hong Kong, and it also lasts for three months. But that’s great, really. I have had two boring-to-hell summers before, so time to have some changes. Besides, I get PAID, from both of them. What can inspire people better than a bunch of money? Two bunches of money of course. Am I being too honest here? But hey, I don’t want to be a hypocrite. I can get valuable experience and get paid at the same time. Isn’t that great?
Wow, I have written so much… It is so easy for me to write too much… Ok, last thing. What shall I do to prepare my first journey of GSoC?
  1. Make a blog, checked.
  2. Make the Github repository, checked.
  3. Buy a book for OpenGL reference, on its way.
  4. Get bounding with the community, here I go!
Better keeps moving, ’cause wonderful things are happening!