Hi all, the blog post for this week will be relatively short as I have been sick lately, however, I did fix a few things.
Fixing texture rotation
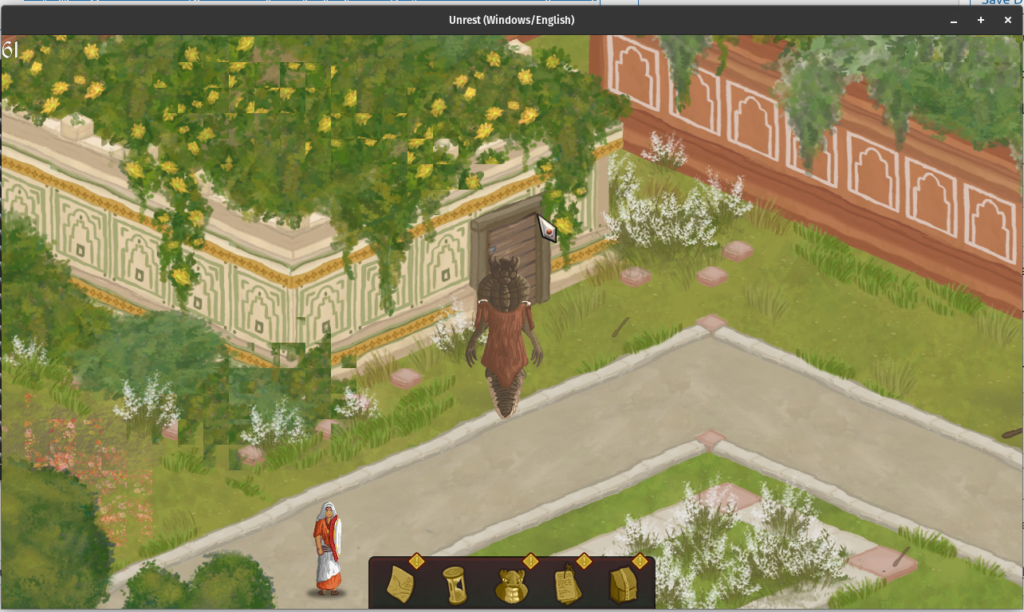
At the start of the week, I tackled the problem of the missing texture rotation due to which tiles were incorrectly rendered as below.
Incorrectly rendered tiles
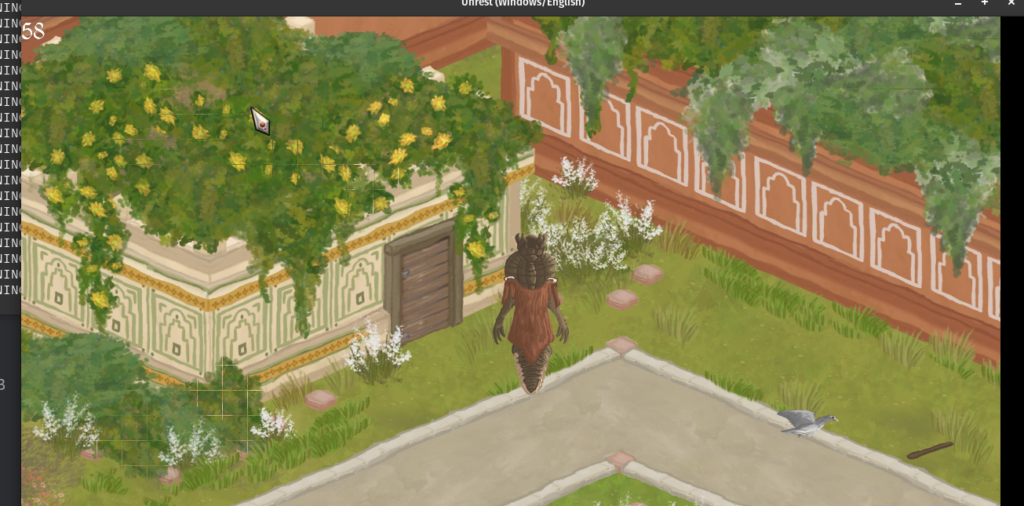
I tried fixing this using the rotoscale function, however, that gave a weird “boxy” look to the rotated tiles. For example, in the following picture, it is particularly noticeable in the grass texture at the bottom left of the screen.
This was intriguing as this function was already being used by other engines such as WinterMute and they did not seem to have come across this problem. To dig deeper, I dumped the texture to a png file after rotation and – apparently the rotated texture had different dimensions(32×33) as compared to the original texture(32×32). I was, however, not able to fix this.
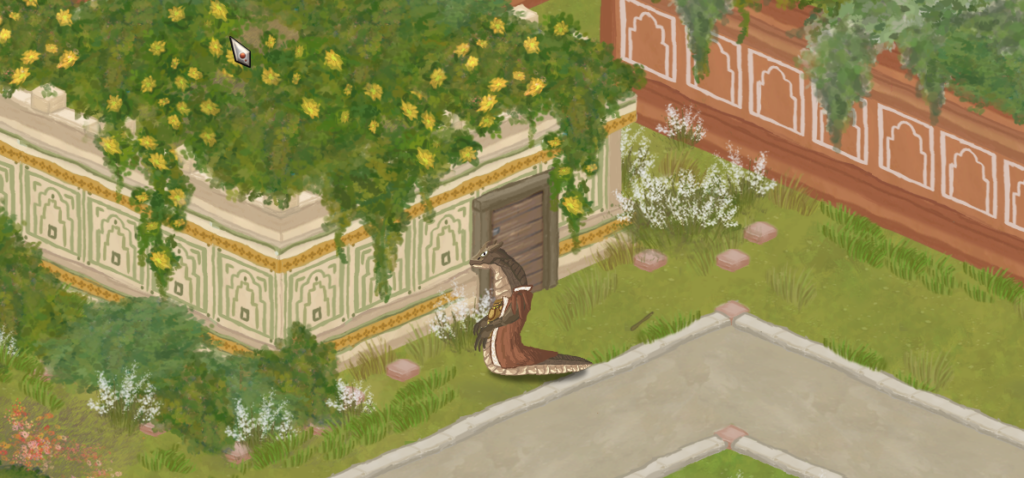
FractureHill, the developer for the “Nancy Drew” engine confirmed that he had the same issue and ended up rolling his own implementation for rotating textures. So, I copied the relevant code, optimized it a bit, and voila – it worked perfectly! 🙂
No more “boxy” look!
Miscellaneous other graphical fixes
There are some other small fixes that I made this week, most noticeably I fixed a bug due to which border tiles were missing from some scenes.
Missing tiles at the bottomNo more missing tiles!
That is all for this week. Next week I will focus on getting saves to work correctly. Please look forward to my future blog posts and thanks for reading! 🙂
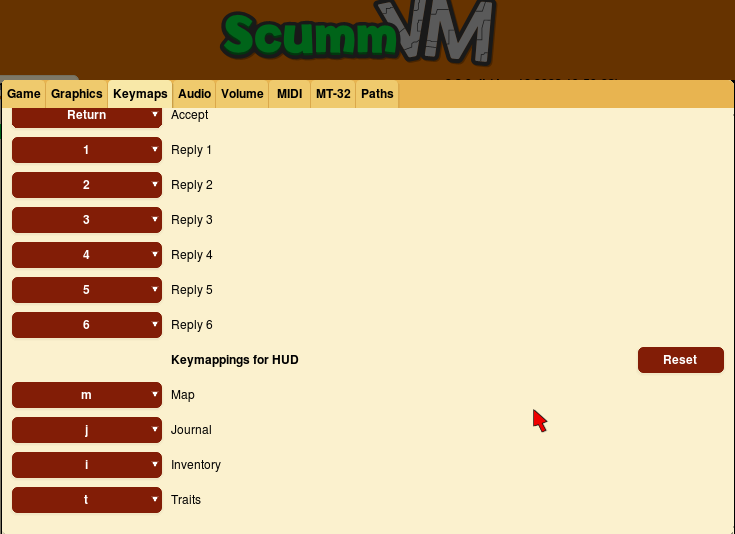
Hi all, I’ve spent my time implementing keyboard controls using Keymapper this week. In this blog, we’ll talk about a bit of the process and the final result.
A short introduction
By utilizing the key mapper, you can allow users to assign actions to keyboard keys or shortcuts, or to mouse or joystick buttons.
Users can go into the “keymaps” tab and change their keymappings from there.
In the original game, the ability to remap keys was already present.
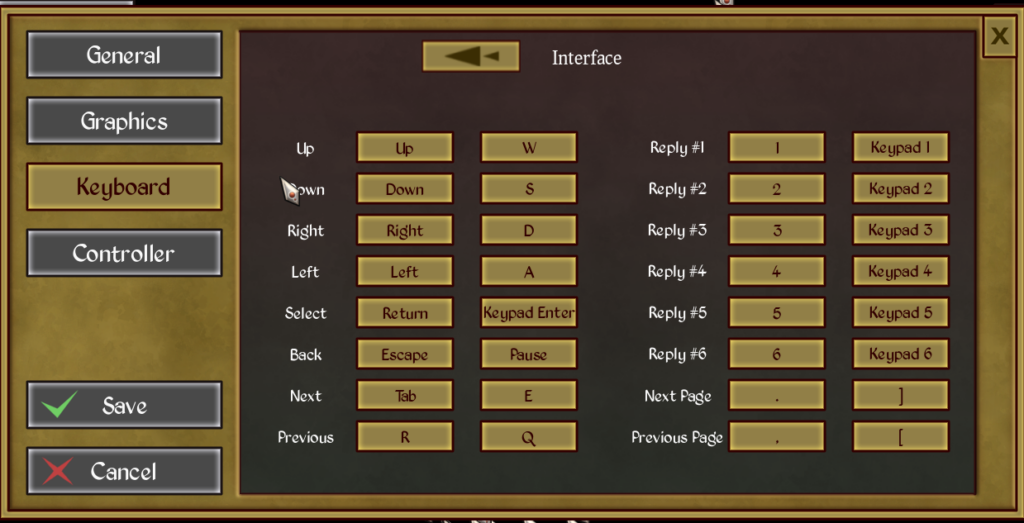
As you can see Unrest allowed you to remap two “categories” of keys – Gameplay and Interface.
Process
Initially, I faced problems in implementing the keymaps correctly due to the way the keymap architecture worked.
From what I understand, the Keymapper architecture is primarily made of a collection of keymaps called a KeymapArray, where every keymap has a collection of actions.
Almost all the pre-existing engines utilized a single Keymap. However, our case required at least two Keymap(s) – one for the gameplay and one for the UI components.
You cannot simply add two Keymaps to the Keymapper because of the way inputs are handled in Unrest. Only a single Keymap needs to be active at any given time.
After some deliberation with my mentors, we came up with a simple solution. All I needed to do was simply switch to the UI Keymap when a UI component was visible on the screen and then switch back to the gameplay one once the UI component was closed. There was one small problem in this though, the game didn’t keep track of whether a UI element was being drawn on screen or not.
I went through the source code of the engine and noticed that a majority of UI components were inherited from the menu class. I utilized this to my advantage and simply added the Keymap flipping logic to the menu class. This worked wonderfully, and now I was able to control most of the game using my keyboard!
Results
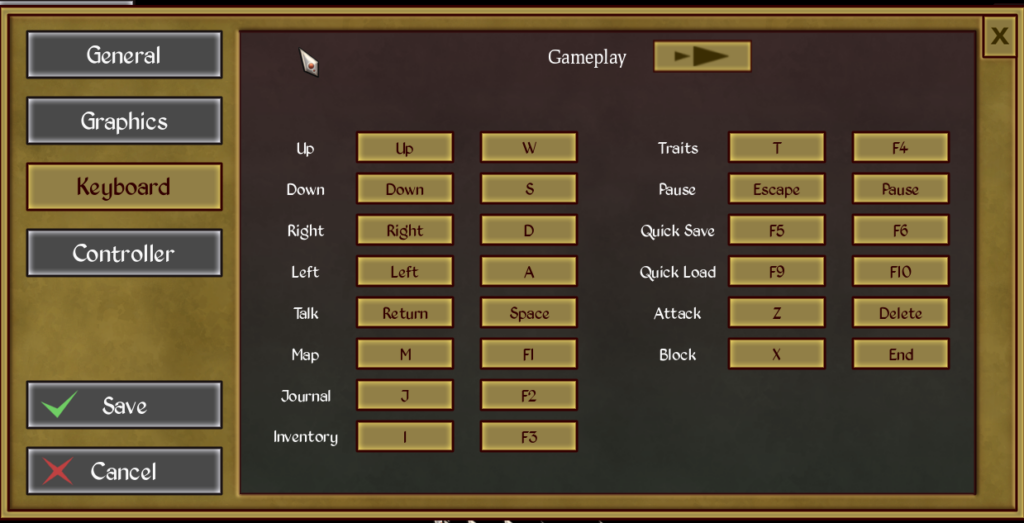
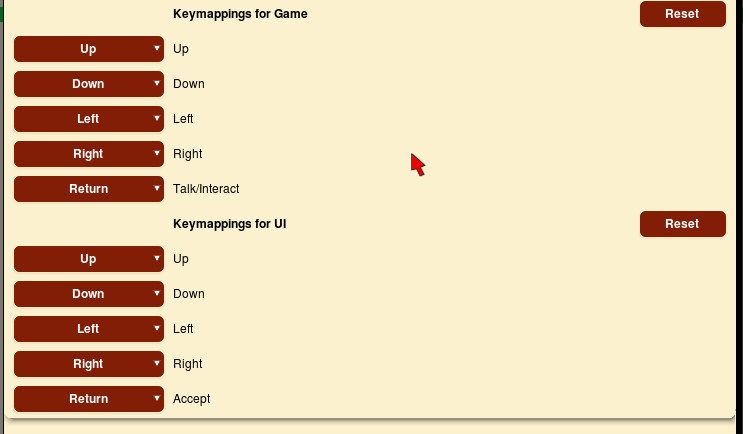
You are now able to remap three different categories of keymaps – Game, UI and HUD.
These are the default keymappings which you will be able to change as per your wish! 🙂
Hi all, this week I worked on replacing STL(Standard Library) with the alternatives provided by ScummVM. I will be talking about the same today.
Why do we need to replace STL
The answer to this is that ScummVM needs to support many platforms, and every platform may not provide a modern enough compiler for the codebase to compile. For example, an engine may require features introduced in c++17, but some platforms’ compilers might only support c++11 at max. Therefore, to maintain compatibility ScummVM provides its own replacements for STL.
How I replaced STL in CRAB
During the writing of my proposal, I had already gone through the codebase of CRAB and made a note of what STL containers CRAB used and the replacements that existed for them in ScummVM.
Alternatives for almost all the STL containers/algorithms needed for CRAB were already available, thus, the process was basically effortless. The only thing which did not exist already in ScummVM and that I added was Common::remove().
With commit #03b75da the engine became fully independent of any STL headers which were not permitted by ScummVM(Remember, we had previously used FORBIDDEN_SYMBOL_ALLOW_ALL to get past this requirement.)
Bonus: A troublesome bug
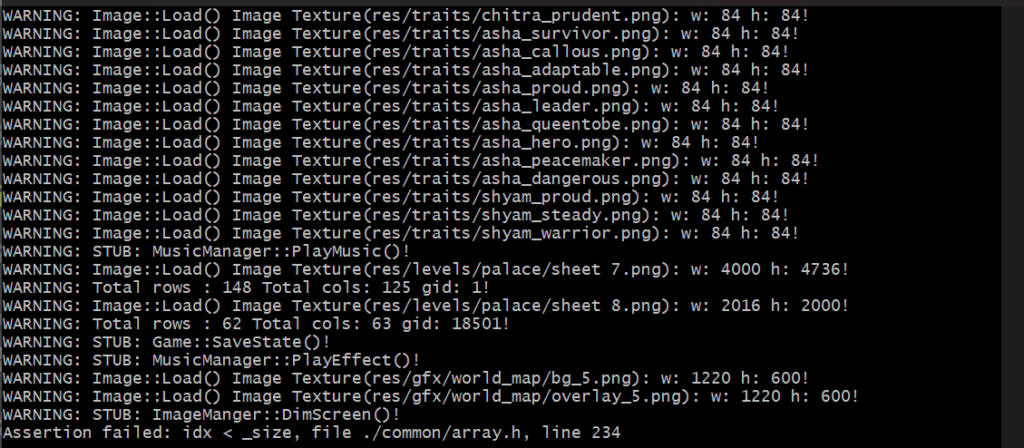
After I had made a significant number of commits replacing STL with their alternatives, I switched my OS back to Windows and tried compiling with mingw64 and guess what, the engine would fail on an assert statement. Now, this is where things got interesting. When the engine was compiled using any other compiler(gcc, msvc, clang++), the assertion never failed and it continued as normal. 🙂
Mingw64 did not support ubsan as of writing and the trace produced by gdb looked.. valid and okay. This is where I took the good old debugging-via-printf route and generated a log file which I compared to the logs produced by the original game and Viola! I noticed a difference.
The GameEvent class has an enum member state which decides what animation frame for a particular character is drawn. In the logs produced by the original game, the value for state was suspiciously large for the first few frames whereas the other log showed that the value was pretty small always (1 – 3). The question that immediately arose in my mind was why would the value be so large in the original game as this was an index number and it is supposed to be small. I added some more printfs and soon I discovered the core issue – state variable was never initialized as the parametrized constructor did not delegate to the default constructor and thus it contained garbage values. 😉
And with this single-line fix, the engine started to work again when compiled using mingw64!
My primary purpose in mentioning this bug was to make future Engine-Porters aware that:
Do not assume that the original engine does not contain any bugs.
Small irrelevant changes can have a larger cascade effect and make engines crash at seemingly unintuitive places.
and probably the most important:
Always test your changes with different compilers.
Hi all! As promised, in this week’s blog post we’ll look more into the performance issues I faced while porting.
The progress so far
For those who did not read my previous blog post, I’ll quickly go through what the performance looked like in my previous blog post.
We had the game running at 10 fps when in reality it should run at 60 fps. I tried optimizing some minor things but did not gain any massive advantage in fps. This prompted a deeper look into my blitting code and how the game blits the level itself.
A deeper look into the problem.
Before we dive into the solutions, we must first ensure that we understand the root cause of the problem and create a mental idea of what we really can optimize and what we can’t.
Let’s look at the video again.
Notice, how the camera moves around with the player? This means that everything on the screen(every tile, every object, etc.) needs to be redrawn every frame. Now as you can imagine, this is really costly.
By looking at the video we can think of following optimizations:
This game did work at 60 fps in the stock build, which means ScummVM’s blitting code is slow. If we could somehow optimize the blitting code, we could gain a lot of performance.
Most of the objects on the screen appear to be static, i.e., props and tiles do not seem to change a lot. We could pre-render the stage/level to a texture and move that texture around as per our needs.
Let’s talk about these ideas in a slightly bit more detail.
The important thing to ask in the first idea is why. Why are ScummVM’s blitting calls slower when compared to SDL? The answer is vectorization. SDL has vectorized blitting routines which are orders of magnitude faster. I suggest you to read Eklipsed’s excellent blog on the same subject where he talks about this in a more technical fashion. “Overall the worst culprit was converting the pixel formats, and then blending.” If we could somehow optimize this, we would definitely get better performance.
Coming to the next idea, the instant question that pops into mind is that how is it any better if one still has to redraw the whole screen every time. The thing is that every level is divided into several layers and each of these layers is drawn over other layers to render the full level. The bottom layers could have pixels that are then overdrawn by pixels of the upper layer which wastes a lot of CPU cycles. We could simply pre-render this to a texture and move that texture around. Since we won’t have to redraw every layer again and again, we can expect to gain some performance.
Now, we’ll see how I actually implemented these ideas.
Solutions:
Idea 1(Optimize pixel conversion and alpha blending/testing)
Both our screen and our textures are RGBA8888, so we actually don’t need to perform this step at all. 😉
However, we still need to access every individual pixel because of alpha blending/testing. I implemented alpha testing for a quick test as per a suggestion by sev since all that needs to be done in alpha testing is to check whether the specified pixel has some alpha value.
Sadly, this did not give us the massive improvement which I was hoping for.
15 fps only :/ and with artefacts
Idea 2(Optimize drawing code)
At the cost of increasing the load times, we could pre-render a level with its different layers to a texture. We can actually combine both idea 1 and idea 2 to create a more-optimized solution. Theoretically, once you have the texture of the level, you just need to copy it to the screen. You do not need to perform any sort of blending or pixel conversion! This sounds like a perfect use-case for memcpy and guess what? Yup, you guessed it right, memcpy is vectorized.
Implementing this was a bit harder, but at last, I was able to get it to work.
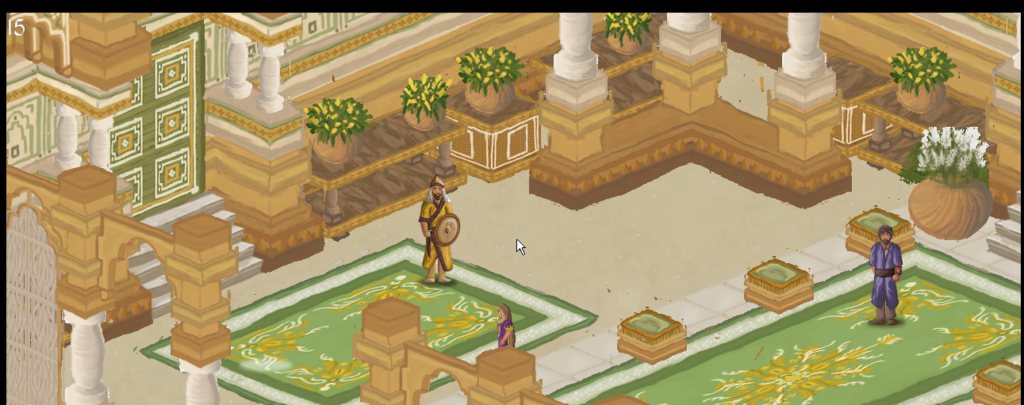
We finally get the glorious 60 fps, we had been waiting for. But as some of you might have already noticed, layering is broken. 🙂
Uh-oh!
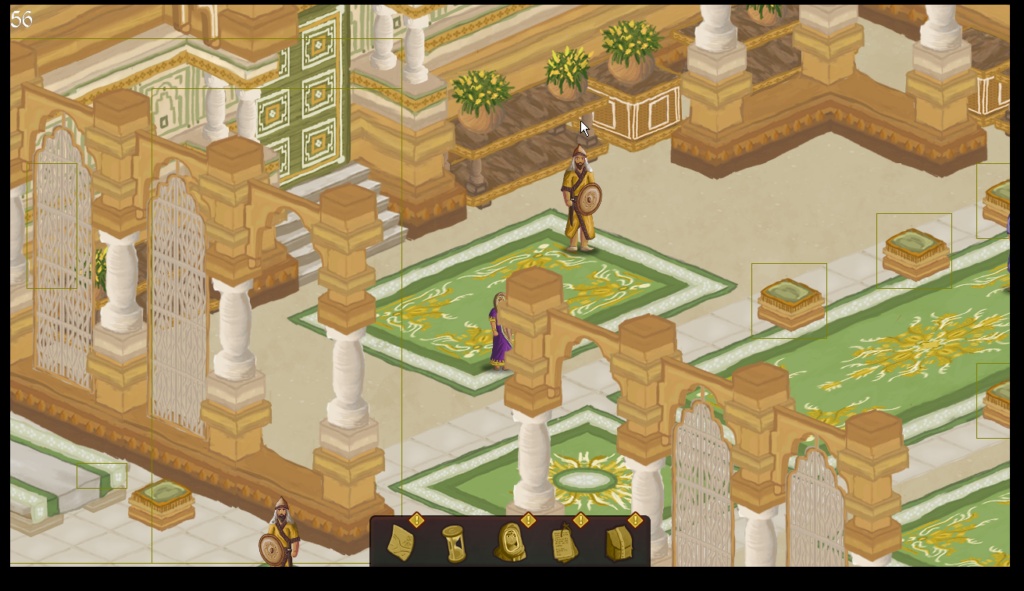
Since we’re pre-rendering the objects and prop layer, the character is simply drawn over the texture totally breaking layering. There is one possible solution to this situation: Calculate what object is colliding with the player and redraw that.
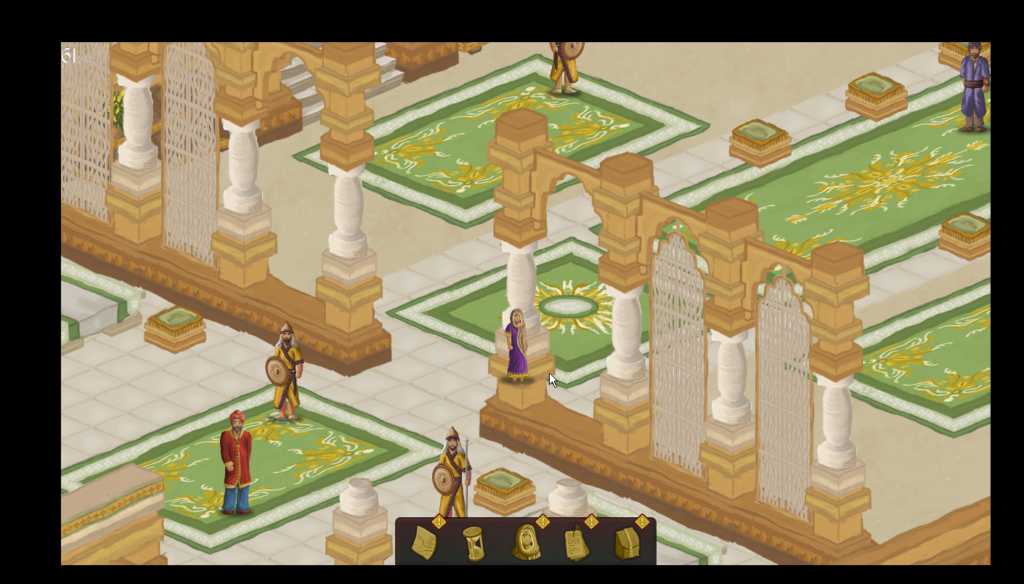
Fixed layering – the character is drawn behind the pillar as intended!
However, while this works for objects, this does not work with the normal layer.
What I ended up doing was, re-rendering only the parts of the normal layer and the objects which were colliding with the character. This performs even better since we redraw only parts and not the whole texture!
I would like to note that the solution is not perfect but it does work quite nicely.
TL;DR: I was able to optimize the code and get it to render at 60 fps albeit with some small issues.
Thanks for reading and please look forward to future blog posts!