Scriping and Dynamics – IV

As I mentioned in the previous post, I have been working on fire grids and I wanted to post some updates on my progress.

To start things off I created two main classes: FireGrid and GridCell; a fire grid is simply a 2D array of GridCell instances that also provides utility methods to get a specific cell from a coordinate or to get the neighbours of the provided cell.

I will be using an expression to simulate the logic and I decided to structure my code so that everything happens in steps: those are going to be calculated and executed every frame through an expression that calls some python code and that’s where most of the logic is going to lie.

In order to test things out I create a polyCube instance for each Cell and I have added some global variables to regulate both the cell size and the grid size: those will be exposed later on by the tool I will be writing to allow the user to tweak the simulation based on how big the scene is going to be.

For the next week my plan is to research and find a way to specify a material for each cell, one of the methods I have in mind to solve it would be raycasting but I would need to research this further and look at the documentation to find out if it’s possible to do so.

Dirty Rectangles system performance considerations

As I’ve spent the last week fixing some minor bugs and documenting code, I wanted to analyse better the effects of this system on the current games.
I’ve done some profiling by measuring fps in two modes: analysis and release;
Analysis build is a build with less optimizations enabled and debug symbols whilst release mode is the classic o3 build with every possible optimization enabled.
The scenes used for these tests are the following:
EMI – ship scene, lucre island and act 1 beginning.
Grim demo: first scenes of the demo.

Here are some screenshots for clarity.

And here are some results.

Before dirty rectangle system (analysis / release):
Ship scene: 13.50 / 57 fps
Lucre Island: 9 / 47 fps
Act 1 Beginning: 25 / 135 fps
Grim scene 1: 50 / 160 fps
Grim scene 2: 62 / 220 fps
Grim scene 3: 57 / 243 fps
Grim scene 4: 60 / 205 fps
After dirty rectangle system (analysis / release):
Ship scene: 12 / 55 fps
Lucre Island: 9 / 45 fps
Act 1 Beginning: 24 / 133 fps
Grim scene 1: 23 / 136 fps
Grim scene 2: 62 / 500 fps
Grim scene 3: 27 / 180 fps
Grim scene 4: 42 / 250 fps

As we can see dirty rects introduces an heavy overhead, especially with analysis build; but release build is somewhat balanced: the fps is pretty much the same for crowded scenes whereas it goes up by quite a bit if the scene has only a few animated objects (like grim scene 2 or scene 4, where animated objects are small and dirty rects yield some performance advantage).

In my personal opinion dirty rects should only be employed on some specific scenarios, as its overhead generally slows down the code and it only shines in some cases.
Dirty rects is a system that is probably better off being used in 2D games where screen changes are more controllable and there is no need to perform more calculation to know which region of the screen is going to be affected.

Developing this system was quite challenging and it took a lot of time but I think that the overall task was beneficial because it gave us an insight on how this could have affected performance: I think that implementing this system on an higher level of abstraction might result in being more effective but more research would be required for doing so (such system would not be applicable for this project though as the engine has to support a vast variety of games).

Dirty Rectangle System Pt 4

In the past week I’ve been working on the last two tasks for dirty rects:
The first one was implementing a system that allowed to clip a draw call and only render a portion of what’s supposed to be drawn, I implemented this in three different ways, based on the type of the draw call:

Blitting draw calls were implemented with a scissor rectangle logic inside the blitting module: this allows the clipping to be very fast as the clipped parts are skipped completely.

Rasterization draw calls are implemented in a different way: this time the scissor rectangle function is implemented on a pixel level, which means that every pixel is checked to be within the scissor rect before being written to the color buffer: this allows the dirty rects system to ignore everything that is outside the dirty region and thus manages to not cover regions that shouldn’t be touched that frame.

Clear buffers draw calls are clipped with a special function inside FrameBuffer that only clears a region of the screen instead of clearing everything.

This covers the implementation of the first sub task: the second one was to detect which regions of the screen changed and output a list of rectangles that need to be updated.

This task was implemented by keeping a copy of the previous frame draw calls and comparing the current frame draw calls with the previous one: this comparison tries to find the first difference between the two lists and then marks as dirty every rectangle that is covered by subsequent draw calls.
Once this list is obtained with this method I also use a simple merging algorithm to avoid re-rendering of the same region with overlapping rectangles and also to reduce the number of draw calls.

What happens after I have this information can be described with the following pseudocode:

foreach (drawCall in currentFrame.drawCalls) {
    foreach (dirtyRegion in currentFrame.dirtyRegions) {
        if (drawCall.dirtyRegion.intersects(dirtyRegion)) {
           drawCall.execute(dirtyRegion);
        }
    }
}

There’s only one problem with this implementation: I have found that EMI intro sequence is not detected properly and causes some glitches whereas everything else works fine.

From what I’ve seen though this method isn’t helping the overall engine performance by much: as most of the time is spent in 3D rasterization this system doesn’t cope well with animated models that change very frequently and fails to be effective.

I will keep you updated with how this progresses in the next blog posts, stay tuned for more info!

Dirty Rectangle System Pt 3

In the past days I’ve been working on dirty rectangle system and I wanted to share some results I have achieved in this blog post:

First of all, I had to introduce a new type of draw call that turned out to be needed: Clear Buffer; this type of draw call just clears either the color or the z buffer (or both, if needed) and it always has a full rectangle screen as dirty region.

When I had all the draw call types implemented I just had to make them work in deferred mode: in order to make this possible I had to track down all the state that was needed by TinyGL to perform that specific draw call and then store it so that I could apply this state before performing the actual drawing logic.
Having done this, sub task 1 proved to be easily implemented as I just had to store all the draw calls in a queue and then perform them sequentially when the frame was marked as “done”.

With sub task 1 done I then proceeded with the calculation of which portion of the screen a draw call was going to affect: calculating this was rather easy for blit draw calls but it turns out that calculating what a rasterization draw call is going to affect isn’t very complex either: I just had to calculate a bounding rectangle that contained all the vertices (after those were transformed to screen space).

Since I had all the information about the dirty regions of the screen I wanted to display this information on the screen so that I could see which part was affected by which type of draw call so here’s some screenshots (red rectangles are blitting draw calls while green rectangles are rasterization draw calls):

Now I only need to work on the last two sub tasks:

  1. Implement the logic behind draw calls that allows the caller to specify a clipping rectangle for that specific instance.
  2. Implement the logic that detects the difference between draw calls and performs clipping on them.

But I’ll write more about these as the work progresses, as for now… stay tuned!

Dirty Rectangle System Pt 2

In this second part of the Dirty Rectangle System series I will describe the different categories and types of draw calls that are implemented in TinyGL, what is required for them to be performed and thus the state that needs to be tracked down and saved.

Since TinyGL is an implementation of openGL the most important category of draw call falls into the category of rasterization: that is, when vertices are issued inside tinyGL’s state machine they are then transformed into screen buffer coordinates and then rasterized into triangles or rendered as lines.
However, since 2D blitting is implemented with a different code path we should regard this as a second category.

So we end up having two categories of draw calls: rasterization and blitting; those categories contain different cases though, so they should be separated in types:
Rasterization can either be a triangle rendering draw call or a line rendering draw call, whereas Blitting can occur on the screen buffer or the z buffer.

I will implement those two different Categories as two subclasses of DrawCall but I will differentiate the logic behind the types inside the implementation of those two classes instead of creating more indirection (as they share 90% of the code and only a few things are to be implemented differently between types inside the same category).

As this task is quite complex and elaborate I decided to split everything in 4 sub tasks that will help me track my progress and make sure that everything is working on a step by step basis:

  1. Implementing a system that store and defers draw calls instances until the “end of frame” marker function has been called.
  2. Implement a system that detects which part of the screen is affected by each draw call and shows a rectangle on the screen.
  3. Implement the logic behind draw calls that allows the caller to specify a clipping rectangle for that specific instance.
  4. Implement the logic that detects the difference between draw calls and performs clipping on them.
The next post will cover the implementation of those DrawCalls subclasses more in depth so stay tuned if you’re interested in this!

Dirty Rectangle System Pt 1

Dirty Rectangles system is a term used for a specific rendering optimization that consists in tracking which parts of the screen changed from the previous frame and rendering only what has changed.
Implementing this sort of system is part of my last task for Google Summer of Code and it’s probably the biggest and most difficult task I worked on so far.

In order to implement this kind of system inside TinyGL, a system that defers draw calls is required; once this system is implemented then dirty rectangles will be as easy as comparing draw call from current and previous frame and decide which parts to render based on this information.

As every draw call needs to be stored (along with all the information to execute it) the best way to implement this is to use polymorphism and let every subclass of DrawCall store whatever information is needed, thus saving space (because only the necessary information will be stored) at the cost of a minimal performance impact due to virtual functions.

This would be the interface of the class DrawCall:

class DrawCall {
public:
	DrawCall();
	virtual ~DrawCall();
	virtual void execute();
	virtual void execute(const Common::Rect &clippingRectangle);
	virtual bool compare(const DrawCall &other);
private:

};

As you can see the class exposes some basic functionalities that are required to implement dirty rects: you need to be able to compare if two draw calls are equals and you need to be able to perform the draw call (with or without a restricting rectangle).

At the moment only a few operations would be encapsulated inside this class, namely blitting (on framebuffer or zbuffer) and triangle and line rasterization.

That’s all for the first part of this series of posts, the next one will describe more in depth the implementation of DrawCall subclasses and the problems that arise with encapsulating blitting and 3d rendering operations!

2D Blitting API implementation explained.

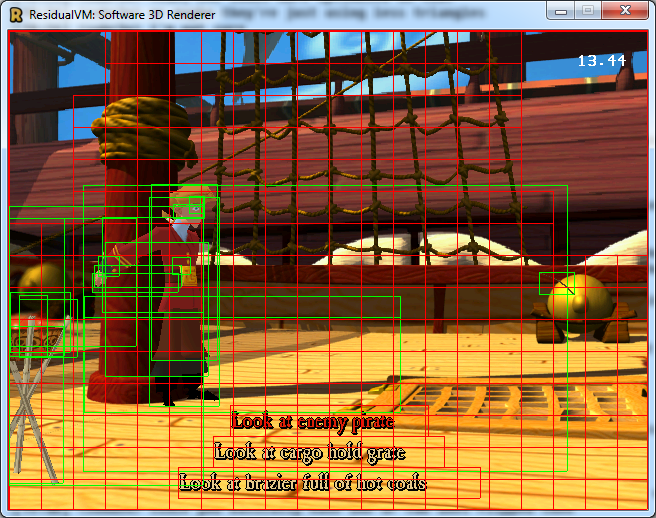
In the past week I’ve been working on the implementation for the 2D blitting API for TinyGL. As I’ve already explained and shown the design of the API I wanted to discuss its implementation in this blogpost.

At its core the API is implemented through a templated function called tglBlitGeneric:

template <bool disableBlending, bool disableColoring, bool disableTransform, bool flipVertical, bool flipHorizontal>
FORCEINLINE void tglBlitGeneric(BlitImage *blitImage, const BlitTransform &transform) {
	if (disableTransform) {
		if (disableBlending && flipVertical == false && flipHorizontal == false) {
			tglBlitRLE<disableColoring>(/* params */);
		} else {
			tglBlitSimple<disableBlending, disableColoring, flipVertical, flipHorizontal>(/* params */);
		}
	} else {
		if (transform._rotation == 0) {
			tglBlitScale<disableBlending, disableColoring, flipVertical, flipHorizontal>(/* params */);
		} else {
			tglBlitRotoScale<disableBlending, disableColoring, flipVertical, flipHorizontal>(/* params */);
		}
	}
}

This function chooses the best implementation based on its template parameters (everything is computed on compile time so this boils down to a simple function call), the current implementation supports different paths optimized for some cases:

  • tglBlitRLE
  • tglBlitSimple
  • tglBlitScale
  • tglBlitRotoScale

tglBlitRLE is an implementation that optimizes rendering by skipping transparent lines in the bitmap (those lines are loaded in advance when the blitting image is uploaded inside TinyGL through tglUploadBlitImage) and is usually selected when blending and sprite transforms are disabled.

tglBlitSimple is an implementation that cover a basic case where the sprite has to make use of pixel blending but is not transformed in any way (ie. not rotated or scaled) but it can be tinted or flipped either vertically, horizontally or both ways.

tglBlitScale is used when scaling is applied (plus whatever is needed between blending, tinting and flipping).

tglBlitRotoScale is used when all the extra features of blitting are needed: rotation, scaling plus blending/tinting/flipping.

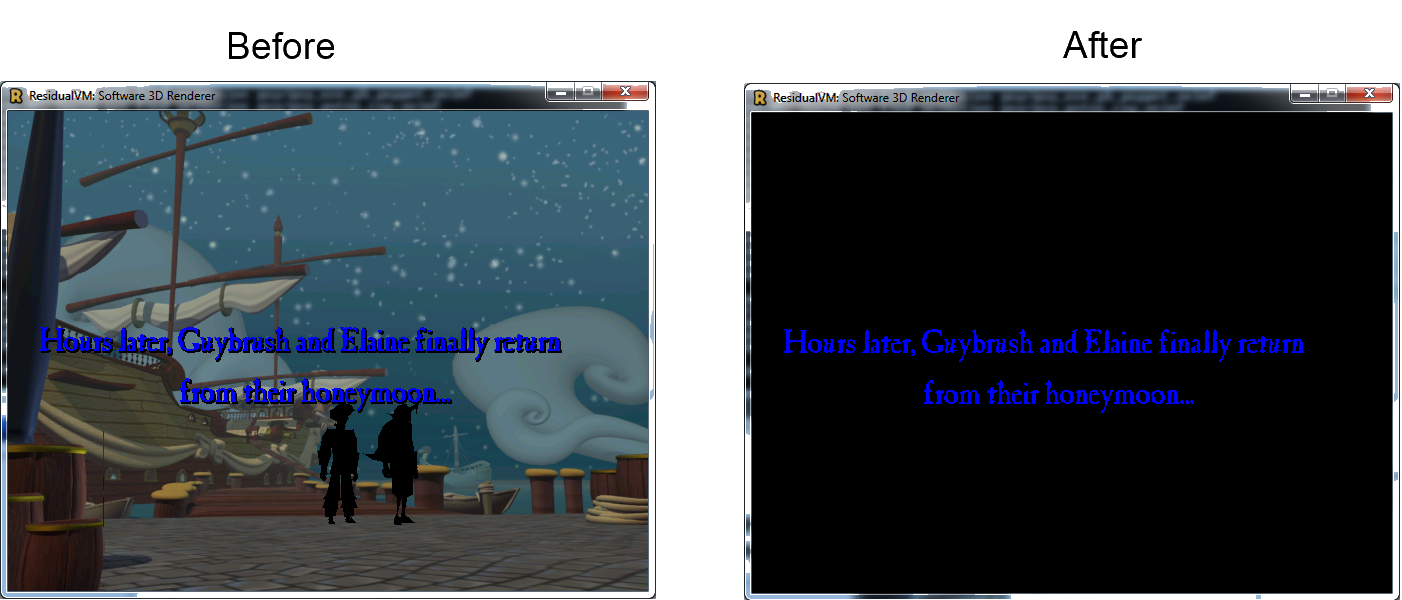
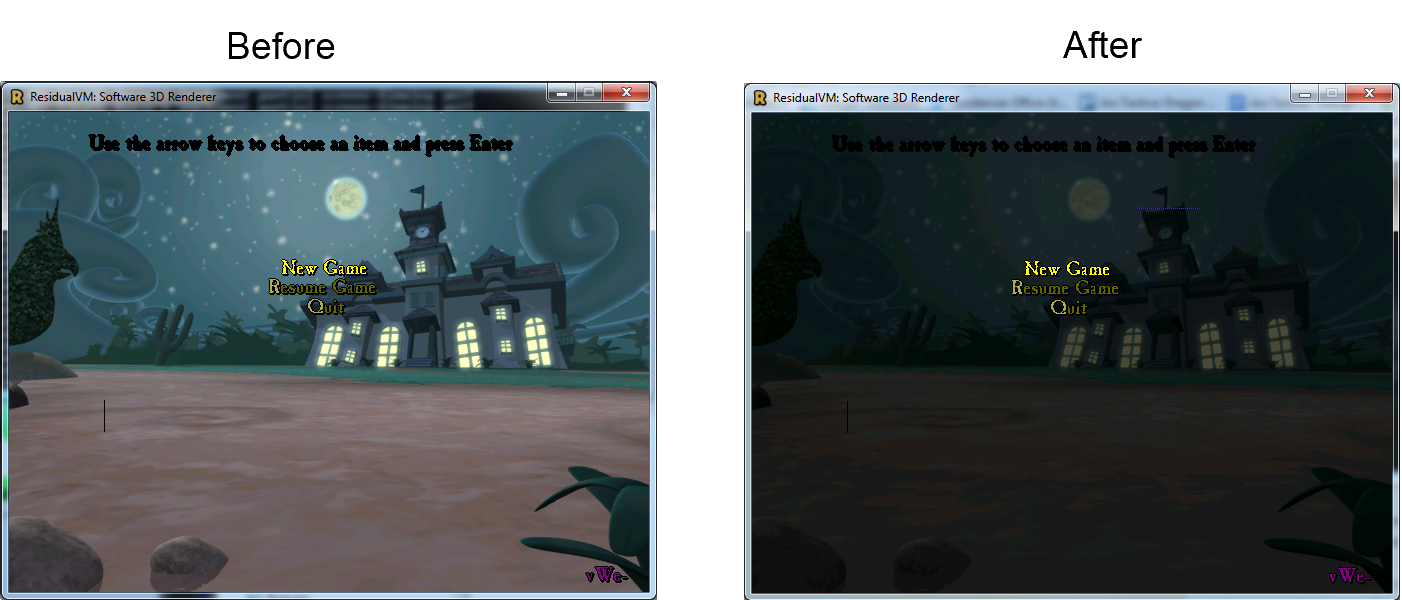
After implementing the API I also had to replace the existing implementation in both engines: Grim and Myst3, the ending result is obviously the same but the code is now shared between the engines and any optimization will benefit both from now on.

This code will also be beneficial for the implementation of my next task: Dirty rectangle optimization that consists in preventing a redraw of the screen if the contents haven’t changed, I will talk more about it and its design in my next blogpost this week.
Stay tuned!

TinyGL 2D blitting API

In the past week I’ve been working on the design and implementation of the 2D rendering API that will be used as an extension to TinyGL.
I already listed all the features that I wanted to expose in the API and here’s the result:

Blitting api header:

struct BlitTransform {
	BlitTransform(int dstX, int dstY);
	void sourceRectangle(int srcX, int srcY, int srcWidth, int srcHeight);
	void tint(float aTint, float rTint = 1.0f, float gTint = 1.0f, float bTint = 1.0f);
	void scale(int width, int height);
	void rotate(float rotation, float originX, float originY);
	void flip(bool verticalFlip, bool horizontalFlip);
 
	Common::Rect _sourceRectangle;
	Common::Rect _destinationRectangle;
	float _rotation;
	float _originX, _originY;
	float _aTint, _rTint, _gTint, _bTint;
	bool _flipHorizontally, _flipVertically;
};
 
struct BlitImage;
 
BlitImage *tglGenBlitImage();
void tglUploadBlitImage(BlitImage *blitImage, const Graphics::Surface &surface, uint32 colorKey, bool applyColorKey);
void tglDeleteBlitImage(BlitImage *blitImage);
 
void tglBlit(BlitImage *blitImage, const BlitTransform &transform);
 
// Disables blending explicitly.
void tglBlitNoBlend(BlitImage *blitImage, const BlitTransform &transform);
 
// Disables blending, transforms and tinting.
void tglBlitFast(BlitImage *blitImage, int x, int y);

The API is pretty simple but effective: it allows you to create and delete textures and to blit them. Its implementation under the hood is somewhat more involved: I only have a generic templated function that takes care of blitting, this function has a few parameters that allow me to skip some computation if they’re not needed (skipping pixel blending, sprite transformation or tinting etc).

Since everything else is hidden the implementation can always be expanded and this can allow some aggressive optimizations like RLE encoding or just memcpy-ing the whole sprite if I know it’s totally opaque and blending is not enabled and so on.

For the next week I will keep on refining the implementation to add all those optimized cases and I will also work into integrating this new API on the existing engines: some work has already been done on myst3 engine but there’s still a lot to do for the grim engine as it is way more complex compared to myst3.

I will keep you updated in the next posts as I will probably post more updates this week, stay tuned!

TinyGL and 2D rendering.

My task for the next two weeks is going to be an implementation of a standard way of rendering 2D sprites with TinyGL.

At the moment, whenever a residual game engine needs to render a 2D sprites, different techniques are employed; Grim Fandango’s engine supports RLE sprites and has a faster code path for 2D binary transparency whilst Myst3’s engine only supports basic 2D rendering.
Moreover, features like sprite tinting, rotation and scaling are not easily implemented when using software rendering as they would require an explicit code path (which is, currently, unavailable).

Having said that in the next two weeks I will work on a standard implementation that will allow any engine that uses tinyGL to render 2D sprites with the following features:

  • Alpha/Additive/Subtractive Blending
  • Fast Binary Transparency
  • Sprite Tinting
  • Rotation
  • Scaling

This implementation will try to follow the same procedure adopted when rendering 2D objects with APIs such as DirectX or OpenGL (since all the current engines use openGL for HW accelerated rendering this seems a rather valid choice to make those two code paths more similar).

As such 2D rendering will require two steps: texture loading and texture rendering.

Texture loading will be needed also to implement features such as RLE faster rendering and to optimize and convert any format to 32 bit – ARGB (allowing to support a broad range of formats externally). Texture rendering will be exposed through a series of functions that allow the renderer to choose the fastest path available for the features requested (ie. if scaling or tinting is not needed then tinyGL will just skip those checks within the rendering code).

That’s it for a general overview of what I will be working on next, stay tuned for updates!

Alpha Blending and Myst 3 Renderer

In the past week I’ve been working on two tasks: implementation of glBlendFunc (and thus alpha blending) and Myst 3 tinyGL software renderer.

After the refactoring of frame buffer code implementing alpha blending was rather easy: every write access to the screen is encapsulated through a function that checks if we enabled blending and what kind of blending is currently active in the internal state machine and performs the operation accordingly.
In order to test the function I forced all the models in Grim Fandango to be 50% transparent and here’s the result:

Surprisingly for me, the implementation of pixel blending in the rendering pipeline did not hurt performance by a substancial amount as the renderer runs just about 8-12% slower than before.

Thanks to the implementation of alpha blending now EMI is rendered correctly, so here’s some screenshot to show the difference:

I also had to work on the implementation of Myst 3 software renderer; the process of implementing it went quite smoothly even though I stumbled upon some limitations of TinyGL (mainly the lack of support to texture bigger than 256×256) that will be hopefully lifted soon.

I leave you with a screenshot comparation of the two versions here so that you can clearly see the difference:

And that’s pretty much it for this week, my next tasks will be to implement some sort of extension to TinyGL to enable 2D blitting and then an internal dirty rect implementation inside TinyGL to avoid redrawing static portions of the screen.