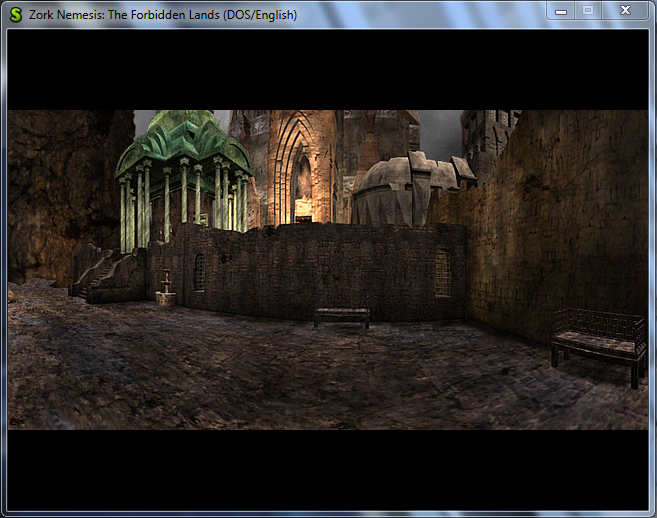
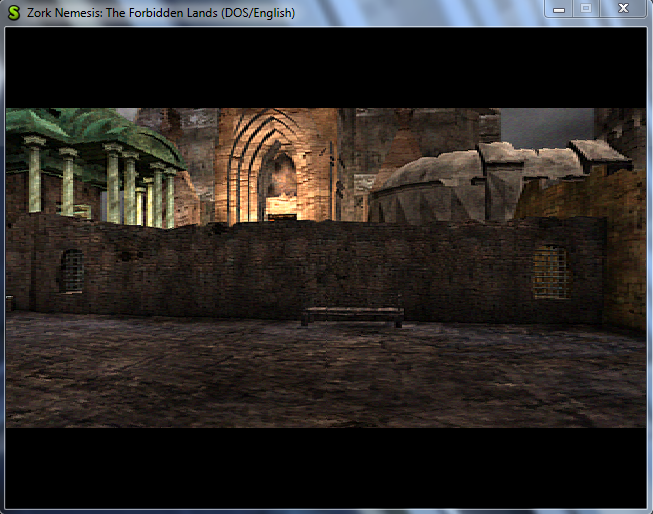
I never knew moving a lever could be so hard

In the Zork games, there are switches/twist knobs/turn-tables:

These are all controlled by the Lever control:

control:624 lever {
    descfile(knocker.lev)
    cursor(handpt)
}

The knocker.lev file looks like this:

animation_id:631~
filename:te2ea21c.rlf~
skipcolor:0~
anim_coords:200 88 343 315~
mirrored:1~
frames:11~
elsewhere:0 0 511 319~
out_of_control:0 0 511 319~
start_pos:0~
hotspot_deltas:42 39~
0:241 252 D=1,90 ^=P(0 to 1) P(1 to 0) P(0 to 1) P(1 to 0) E(0)~
1:234 260 D=2,90 D=0,270 ^=P(1 to 0) E(0)~
2:225 258 D=3,90 D=1,270 ^=P(2 to 0) P(0 to 1) P(1 to 0) E(0)~
3:216 255 D=4,90 D=2,270 ^=P(3 to 0) P(0 to 1) P(1 to 0) E(0)~
4:212 234 D=5,90 D=3,270 ^=P(4 to 0) P(0 to 2) P(2 to 0) E(0)~
5:206 213 D=6,90 D=4,270 ^=P(5 to 0) P(0 to 3) P(3 to 0) E(0)~
6:212 180 D=7,90 D=5,270 ^=P(6 to 0) P(0 to 3) P(3 to 0) E(0)~
7:214 147 D=8,90 D=6,270 ^=P(7 to 0) P(0 to 4) P(4 to 0) E(0)~
8:222 114 D=9,90 D=7,270 ^=P(8 to 0) P(0 to 5) P(4 to 0) E(0)~
9:234 106 D=10,90 D=8,270 ^=P(9 to 0) P(0 to 5) P(4 to 0) E(0)~
10:234 98 D=9,270~
  • animation_id is unused.
  • filename refers to the animation file used.
  • skip color is unused.
  • anim_coords refers to the location the control will be rendered
  • mirrored says that the reverse of the animation is appended to the end of the file. Ex: 0, 1, 2, 3, 3, 2, 1, 0
  • frames refers to how many animation frames there are (If mirrored = 1, frames = animationFile::frameCount / 2)
  • elsewhere is unused
  • out_of_control is unused
  • start_pos refers to the first animation frame used by the control
  • hotspot_deltas refers to the width and height of the hotspots used to grab a control with the mouse

The last section is a bit tricky. It’s formatted like so:

`
[frameNumber]:[hotspotX] [hotspotY] D=[directionToFrame],[directionAngle] .....(potentially more directions) ^=P([from] to [to]) P([from] to [to]) ... (potentially more return paths) E(0)~


  • frameNumber corresponds the animationFile frame that should be displayed when the lever is in that state
  • hotspotX is the X coordinate of the hotspot rectangle in which the user can grab the control
  • hotspotY is the Y coordinate of the hotspot rectangle in which the user can grab the control

D refers to “Direction”. Let’s say we’re at frame 0. D=1,90 means: “To get to frame 1, the mouse needs to be moving at a 90 degree angle.” (I’ll cover how the angles work in a bit)

P refers to “Path”. This is what frames should be rendered after the user lets go of a control. For example, lets say we let go of the knocker at frame 6. The .lev file reads: ^=P(6 to 0) P(0 to 3) P(3 to 0). This says to render every frame from 6 to 0, then every frame from 0 to 3, then every frame from 3 to 0. So written out:

6, 5, 4, 3, 2, 1, 0, 0, 1, 2, 3, 3, 2, 1, 0

This allows for some cool effects such as the knocker returning to the lowest position and bouncing as though it had gravity.

So what is that angle I was talking about? It refers to the direction the mouse is moving while the user is holding down left mouse button.

So let’s go over a typical user interaction:

  1. User hovers over the control. The cursor changes to a hand.
  2. User presses down the left mouse button
  3. Test if the mouse is within the current frame’s hotspot
  4. If so, begin a drag:
    1. Calculate the distance between the last mouse position and the current
    2. If over 64 (a heuristic), calculate the angle. (Only calculating the angle when we’re sufficiently far from the last mouse position saves calculations as well as makes the lever less “twitchy”
    3. Test the angle against the directions
    4. If one passes, render the new frame
  5. User moves a couple more times
  6. User releases the left mouse button
    1. Follow any return paths set out in the .lev file

And that’s it! Let me know if you have any questions or comments. The full source code can be found here and here. Until next time

-RichieSams

One frame at a time

So, we’re entering into the final weekend before the soft pencil’s down for GSoC. It’s been a very busy couple of weeks since university here in the US started 3 weeks ago. So I’ve been juggling homework, labs, and working on this. But you’re not here to for that, so let’s launch into the actual post:

Animations in-game come in two formats: AVI and a custom format called RLF. AVI is simple because I can use the ScummVM AVI decoder. But I had to reverse engineer the RLF file format so it can be played as a video or frame by frame.

Before I go into the format of the file, I want to explain the general schema of animations, or more specifically, video frame compression techniques. (For another reference, the article here is pretty good) The first frame of an animation has to include every pixel, aka, no compression. These frames are called I-frames or key frames. For the next frame, we could store every pixel, but that seems kind of wasteful. Instead, we store only the pixels that changed between the last frame and this frame. These are called P-frames. Optionally, a frame can also store the pixels that changed between the next frame and this frame. These are called B-frames. This allows animations to be played forwards or backwards. With P-frames, we can only go forwards. In order to seek within an animation, we have to find the closest I-frame, then add P/B-frames until we’re at the frame we want. To make this less painful for long animations, video encoders insert I-frames every 120 frames or so. (About 1 I-frame every 5 seconds. Assuming 24 fps, 24 * 5 = 120).

RLF files only use I-frames and P-frames. If they need to go backwards, the whole animation is encoded both forwards and backwards. For example: 0, 1, 2, 3, 4, 5, 5, 4, 3, 2, 1, 0
It seems pretty wasteful in my opinion, but that’s what they do.

The RLF file starts off with a header to describe the information it contains:

bool RlfAnimation::readHeader() {
    if (_file.readUint32BE() != MKTAG('F', 'E', 'L', 'R')) {
        return false;
    }

    // Read the header
    _file.readUint32LE();                // Size1
    _file.readUint32LE();                // Unknown1
    _file.readUint32LE();                // Unknown2
    _frameCount = _file.readUint32LE();  // Frame count

    // Since we don't need any of the data, we can just seek right to the
    // entries we need rather than read in all the individual entries.
    _file.seek(136, SEEK_CUR);

    //// Read CIN header
    //_file.readUint32BE();          // Magic number FNIC
    //_file.readUint32LE();          // Size2
    //_file.readUint32LE();          // Unknown3
    //_file.readUint32LE();          // Unknown4
    //_file.readUint32LE();          // Unknown5
    //_file.seek(0x18, SEEK_CUR);    // VRLE
    //_file.readUint32LE();          // LRVD
    //_file.readUint32LE();          // Unknown6
    //_file.seek(0x18, SEEK_CUR);    // HRLE
    //_file.readUint32LE();          // ELHD
    //_file.readUint32LE();          // Unknown7
    //_file.seek(0x18, SEEK_CUR);    // HKEY
    //_file.readUint32LE();          // ELRH

    //// Read MIN info header
    //_file.readUint32BE();          // Magic number FNIM
    //_file.readUint32LE();          // Size3
    //_file.readUint32LE();          // OEDV
    //_file.readUint32LE();          // Unknown8
    //_file.readUint32LE();          // Unknown9
    //_file.readUint32LE();          // Unknown10
    _width = _file.readUint32LE();   // Width
    _height = _file.readUint32LE();  // Height

    // Read time header
    _file.readUint32BE();                    // Magic number EMIT
    _file.readUint32LE();                    // Size4
    _file.readUint32LE();                    // Unknown11
    _frameTime = _file.readUint32LE() / 10;  // Frame time in microseconds

    return true;
}

The magic number ‘FELR’ refers to the run-length encoding used in the file. I’ll explain the specifics later on. I’m kind of curious what all the extra information in the header is used for, so if you guys have any ideas, I’m all ears. The useful information is pretty self-explanatory.

After the header is the actual frame data. Each frame also has a header.

RlfAnimation::Frame RlfAnimation::readNextFrame() {
    RlfAnimation::Frame frame;

    _file.readUint32BE();                        // Magic number MARF
    uint32 size = _file.readUint32LE();          // Size
    _file.readUint32LE();                        // Unknown1
    _file.readUint32LE();                        // Unknown2
    uint32 type = _file.readUint32BE();          // Either ELHD or ELRH
    uint32 headerSize = _file.readUint32LE();    // Offset from the beginning of this frame to the frame data. Should always be 28
    _file.readUint32LE();                        // Unknown3

    frame.encodedSize = size - headerSize;
    frame.encodedData = new int8[frame.encodedSize];
    _file.read(frame.encodedData, frame.encodedSize);

    if (type == MKTAG('E', 'L', 'H', 'D')) {
        frame.type = Masked;
    } else if (type == MKTAG('E', 'L', 'R', 'H')) {
        frame.type = Simple;
        _completeFrames.push_back(_lastFrameRead);
    } else {
        warning("Frame %u doesn't have type that can be decoded", _lastFrameRead);
    }

    _lastFrameRead++;
    return frame;
}

If a frame is of type DHLE, it is a P-frame, if it is of type HRLE, it’s an I-frame. We hold off decoding until we actually need to render the frame. This allows for less memory use.

So now we’ve read in all our data. How do we render a frame? The simplest case is to render the next frame. Note: _currentFrameBuffer is a Graphics::Surface that stores the current frame.

const Graphics::Surface *RlfAnimation::getNextFrame() {
    assert(_currentFrame + 1 < (int)_frameCount);

    if (_stream) {
        applyFrameToCurrent(readNextFrame());
    } else {
        applyFrameToCurrent(_currentFrame + 1);
    }

    _currentFrame++;
    return &_currentFrameBuffer;
}

void RlfAnimation::applyFrameToCurrent(uint frameNumber) {
    if (_frames[frameNumber].type == Masked) {
        decodeMaskedRunLengthEncoding(_frames[frameNumber].encodedData, (int8 *)_currentFrameBuffer.getPixels(), _frames[frameNumber].encodedSize, _frameBufferByteSize);
    } else if (_frames[frameNumber].type == Simple) {
        decodeSimpleRunLengthEncoding(_frames[frameNumber].encodedData, (int8 *)_currentFrameBuffer.getPixels(), _frames[frameNumber].encodedSize, _frameBufferByteSize);
    }
}

void RlfAnimation::applyFrameToCurrent(const RlfAnimation::Frame &frame) {
    if (frame.type == Masked) {
        decodeMaskedRunLengthEncoding(frame.encodedData, (int8 *)_currentFrameBuffer.getPixels(), frame.encodedSize, _frameBufferByteSize);
    } else if (frame.type == Simple) {
        decodeSimpleRunLengthEncoding(frame.encodedData, (int8 *)_currentFrameBuffer.getPixels(), frame.encodedSize, _frameBufferByteSize);
    }
}

The decode….() functions simultaneously decode the frame data we read in earlier, and then blit it directly on-top of the _currentFrameBuffer pixels. I’ll explain the details of each function further down.

You might be wondering what the _stream variable refers to? I’ve created the RlfAnimation class so that it can decode in two different ways: it can load all the data from the file into memory and then do all decoding/blitting from memory, or it can stream the data from file, one frame at a time. The first option allows you to seek within the animation, but it uses quite a bit of memory (roughly the size of the file). The second option uses far less memory, but you can only play the animation forwards and can not seek.

On to the decoding functions:

I-frames contain every single pixel within a frame. Again, we could store every one of these, but that would be kind of expensive. So we use a simple compression algorithm called Run Length Encoding. (There are tons of frame compression algorithms out there. This is just the one they chose to use). Consider this image:

And then, let’s choose a specific line of pixels:

If we were to encode each pixel we would need to store:

YYYYYYYBYYYYYYBYYYYYYY

where Y means yellow and B means black. That’s a lot of repeated yellows. Lets instead store this:

7Y1B6Y1B

The numbers represent how many of the following pixels are of the same color. So the decoder would interpret that as: render 7 yellow pixels, 1 black pixel, 6 yellow pixels, 1 black pixel, then 7 yellow pixels.

The RLF files take this idea further. Consider this line of data, where G means green, R means red:

YYYYYBGRYBYGBYYYYYY

If we use the same method as before we get:

5Y1B1G1R1Y1B1Y1G1B6Y

It’s almost as long as the original data! If a color doesn’t have any repetition, using encoding actually takes up more space. To counter that, the RLF files do the following:

5Y-8BGRYBYGB6Y

If the number is negative, the next N pixels are copied directly to the destination. If it’s positive, the next N pixels are filled with the color directly following the number.

Here’s that algorithm in code form:

void RlfAnimation::decodeSimpleRunLengthEncoding(int8 *source, int8 *dest, uint32 sourceSize, uint32 destSize) const {
    uint32 sourceOffset = 0;
    uint32 destOffset = 0;

    while (sourceOffset < sourceSize) {
        int8 numberOfSamples = source[sourceOffset];
        sourceOffset++;

        // If numberOfSamples is negative, the next abs(numberOfSamples) samples should
        // be copied directly from source to dest
        if (numberOfSamples < 0) {
            numberOfSamples = ABS(numberOfSamples);

            while (numberOfSamples > 0) {
                if (sourceOffset + 1 >= sourceSize) {
                    return;
                } else if (destOffset + 1 >= destSize) {
                    return;
                }

                byte r, g, b;
                _pixelFormat555.colorToRGB(READ_LE_UINT16(source + sourceOffset), r, g, b);
                uint16 destColor = _pixelFormat565.RGBToColor(r, g, b);
                WRITE_UINT16(dest + destOffset, destColor);

                sourceOffset += 2;
                destOffset += 2;
                numberOfSamples--;
            }

        // If numberOfSamples is >= 0, copy one sample from source to the 
        // next (numberOfSamples + 2) dest spots
        } else {
            if (sourceOffset + 1 >= sourceSize) {
                return;
            }

            byte r, g, b;
            _pixelFormat555.colorToRGB(READ_LE_UINT16(source + sourceOffset), r, g, b);
            uint16 sampleColor = _pixelFormat565.RGBToColor(r, g, b);
            sourceOffset += 2;

            numberOfSamples += 2;
            while (numberOfSamples > 0) {
                if (destOffset + 1 >= destSize) {
                    return;
                }

                WRITE_UINT16(dest + destOffset, sampleColor);
                destOffset += 2;
                numberOfSamples--;
            }
        }
    }
}

To encode the P-frames, we use a similar method as above. Remember that P-frames are partial frames. They only include the pixels that changed from the last frame. An example pixel line could look like this, where O is a placeholder for empty space:

OOOOBRGOOYYBRGOOOOO

To encode this we do the following:

4-3BRG2-5YYBRG5

If the number read is positive, the next N pixels should be skipped. If the number is negative, the next N pixels should be copied directly to the destination.

Here is that algorithm in code form:

void RlfAnimation::decodeMaskedRunLengthEncoding(int8 *source, int8 *dest, uint32 sourceSize, uint32 destSize) const {
    uint32 sourceOffset = 0;
    uint32 destOffset = 0;

    while (sourceOffset < sourceSize) {
        int8 numberOfSamples = source[sourceOffset];
        sourceOffset++;

        // If numberOfSamples is negative, the next abs(numberOfSamples) samples should
        // be copied directly from source to dest
        if (numberOfSamples < 0) {
            numberOfSamples = ABS(numberOfSamples);

            while (numberOfSamples > 0) {
                if (sourceOffset + 1 >= sourceSize) {
                    return;
                } else if (destOffset + 1 >= destSize) {
                    return;
                }

                byte r, g, b;
                _pixelFormat555.colorToRGB(READ_LE_UINT16(source + sourceOffset), r, g, b);
                uint16 destColor = _pixelFormat565.RGBToColor(r, g, b);
                WRITE_UINT16(dest + destOffset, destColor);

                sourceOffset += 2;
                destOffset += 2;
                numberOfSamples--;
            }

        // If numberOfSamples is >= 0, move destOffset forward ((numberOfSamples * 2) + 2)
        // This function assumes the dest buffer has been memset with 0's.
        } else {
            if (sourceOffset + 1 >= sourceSize) {
                return;
            } else if (destOffset + 1 >= destSize) {
                return;
            }

            destOffset += (numberOfSamples * 2) + 2;
        }
    }
}

Whew! Almost there. The last thing to talk about is frame seeking. This requires that you’re not streaming directly from disk. (Well, you could do it, but it would probably be more trouble than it was worth). As we read in the frames, we stored which frames were I-frames. So to seek to a frame, we iterate through that list of I-frames and find the I-frame closest to our destination frame. Then we use applyFrameToCurrent() to move from the I-frame to the destination frame:

void RlfAnimation::seekToFrame(int frameNumber) {
    assert(!_stream);
    assert(frameNumber < (int)_frameCount || frameNumber >= -1);

    if (frameNumber == -1) {
        _currentFrame = -1;
        return;
    }

    int closestFrame = _currentFrame;
    int distance = (int)frameNumber - _currentFrame;
    for (Common::List<uint>::const_iterator iter = _completeFrames.begin(); iter != _completeFrames.end(); iter++) {
        int newDistance = (int)frameNumber - (int)(*iter);
        if (newDistance > 0 && (closestFrame == -1 || newDistance < distance)) {
            closestFrame = (*iter);
            distance = newDistance;
        }
    }

    for (int i = closestFrame; i <= frameNumber; i++) {
        applyFrameToCurrent(i);
    }

    _currentFrame = frameNumber;
}

That’s it! If you want to look at the full class, you can find it here and here. And as always, if you have ANY questions, feel free to comment. Happy coding!

-RichieSams

One pixel at a time

Over the course of this project, the way I’ve rendered images to the screen has rather drastically changed. Well, let me clarify. Everything is blitted to the screen in exactly the same way ( OSystem::copyRectToScreen ), however, how I get/modify the pixels that I pass to copyRectToScreen() has changed. (Disclaimer: From past experiences, we know that panorama images are stored transposed. However, in this post, I’m not really going to talk about it, though you may see some snippets of that in code examples) So a brief history:

In my first iteration an image would be rendered to the screen as such:

  1. Load the image from file to a pixel buffer
  2. Choose where to put the image.
  3. Choose what portion of the image we want to render to the screen. We don’t actually specify the height/width, just the (x,y) top-left corner
  4. Call renderSubRect(buffer, destinationPoint, Common::Point(200, 0))
  5. Create a subRect of the image by clipping the entire image width/height with the boundaries of the window and the boundaries of the image size
  6. If we’re in Panorama or Tilt RenderState, then warp the pixels of the subRect. (See post about the panorama system)
  7. Render the final pixels to the screen using OSytem::copyRectToScreen()
  8. If we’re rendering a background image (boolean passed in the arguments), check if the dimensions of the subRect completely fill the window boundaries. If they don’t them we need to wrap the image so it seems like it is continuous.
  9. If we need to wrap, calculate a wrappedSubRect and a wrappedDestination point from the subRect dimensions and the window dimensions.
  10. Call renderSubRect(buffer, wrappedDestination, wrappedSubRect)

At first glance, this seems like it would work well; however, it had some major flaws. The biggest problem stemmed from the Z-Vision technology.

To understand why, let’s review how pixel warping works:

  1. We use math to create a table of (x, y) offsets.
  2. For each pixel in the subRect:
    1. Look up the offsets for the corresponding (x, y) position
    2. Add those offsets to the the actual coordinates
    3. Look up the pixel color at the new coordinates
    4. Write that pixel color to the destination buffer at the original coordinates

Let’s give a specific example:

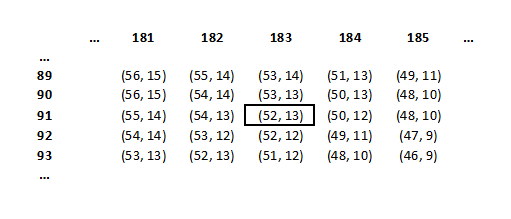
  1. We want to render a pixel located at (183, 91)
  2. We go to the RenderTable and look up the offsets at location (183, 91)
  3. Add (52, 13) to (183, 91) to get (235, 104)
  4. Look up the pixel color at (235, 104). In this example, the color is FFFC00 (Yellow).
  5. Write to color FFFC00 to (183, 91) in the destination buffer

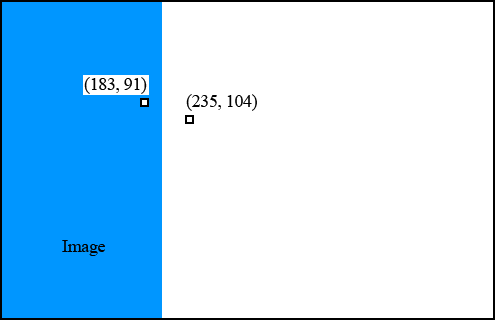
The problem occurs when you’re at the edges of an image. Let’s consider the same scenario, but the image is shifted to the left:

Let’s skip to step 4:
When we try to look up the pixel color at (235, 104) we have a problem. (235, 104) is outside the boundaries of the image.

So, after discussing the problem with wjp, we thought that we could let the pixel warping function ( mutateImage() ) do the image wrapping, instead of doing it in renderSubRectToScreen. Therefore, in renderSubRectToScreen(), instead of clipping subRect to the boundaries of the image, I expand it to fill the entire window. Then inside of mutateImage, if the final pixel coordinates are larger or smaller than the actual image dimensions, I just keep adding or subtracting image widths/heights until the coordinates are in the correct range.

void RenderTable::mutateImage(uint16 *sourceBuffer, uint16* destBuffer, int16 imageWidth, int16 imageHeight, int16 destinationX, int16 destinationY, const Common::Rect &subRect, bool wrap) {
    for (int16 y = subRect.top; y < subRect.bottom; y++) {
        int16 normalizedY = y - subRect.top;
        int32 internalColumnIndex = (normalizedY + destinationY) * _numColumns;
        int32 destColumnIndex = normalizedY * _numColumns;

        for (int16 x = subRect.left; x < subRect.right; x++) {
            int16 normalizedX = x - subRect.left;

            int32 index = internalColumnIndex + normalizedX + destinationX;

            // RenderTable only stores offsets from the original coordinates
            int16 sourceYIndex = y + _internalBuffer[index].y;
            int16 sourceXIndex = x + _internalBuffer[index].x;

            if (wrap) {
                // If the indicies are outside of the dimensions of the image, shift the indicies until they are in range
                while (sourceXIndex >= imageWidth) {
                    sourceXIndex -= imageWidth;
                }
                while (sourceXIndex < 0) {
                    sourceXIndex += imageWidth;
                }

                while (sourceYIndex >= imageHeight) {
                    sourceYIndex -= imageHeight;
                }
                while (sourceYIndex < 0) {
                    sourceYIndex += imageHeight;
                }
            } else {
                // Clamp the yIndex to the size of the image
                sourceYIndex = CLIP<int16>(sourceYIndex, 0, imageHeight - 1);

                // Clamp the xIndex to the size of the image
                sourceXIndex = CLIP<int16>(sourceXIndex, 0, imageWidth - 1);
            }
            
            destBuffer[destColumnIndex + normalizedX] = sourceBuffer[sourceYIndex * imageWidth + sourceXIndex];
        }
    }
}

With these changes, rendering worked well and wrapping/scrolling worked well. However, the way in which Zork games calculate background position forced me to slightly change the model.

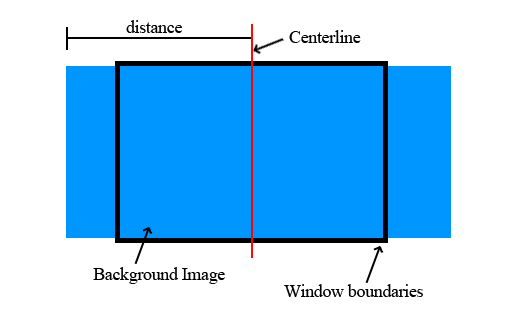
Script files change location by calling “change_location(<world> <room> <nodeview> <location>). location refers to the initial position of the background image. Originally I thought this referred to distance from the top-left corner of the image. So for example, location = 200 would create the following image:

However, it turns out that this is not the case. location refers to distance the top-left corner is from the center line of the window:

Therefore, rather than worry about a subRect at all, I just pass in the destination coordinate, and then try to render the entire image (clipping it to window boundaries):

void RenderManager::renderSubRectToScreen(Graphics::Surface &surface, int16 destinationX, int16 destinationY, bool wrap) {    
    int16 subRectX = 0;
    int16 subRectY = 0;

    // Take care of negative destinations
    if (destinationX < 0) {
        subRectX = -destinationX;
        destinationX = 0;
    } else if (destinationX >= surface.w) {
        // Take care of extreme positive destinations
        destinationX -= surface.w;
    }

    // Take care of negative destinations
    if (destinationY < 0) {
        subRectY = -destinationY;
        destinationY = 0;
    } else if (destinationY >= surface.h) {
        // Take care of extreme positive destinations
        destinationY -= surface.h;
    }

    if (wrap) {
        _backgroundWidth = surface.w;
        _backgroundHeight = surface.h;
    
        if (destinationX > 0) { 
            // Move destinationX to 0
            subRectX = surface.w - destinationX;
            destinationX = 0;
        }

        if (destinationY > 0) {
            // Move destinationY to 0
            subRectX = surface.w - destinationX;
            destinationY = 0;
        }
    }

    // Clip subRect to working window bounds
    Common::Rect subRect(subRectX, subRectY, subRectX + _workingWidth, subRectY + _workingHeight);

    if (!wrap) {
        // Clip to image bounds
        subRect.clip(surface.w, surface.h);
    }

    // Check destRect for validity
    if (!subRect.isValidRect() || subRect.isEmpty())
        return;

    if (_renderTable.getRenderState() == RenderTable::FLAT) {
        _system->copyRectToScreen(surface.getBasePtr(subRect.left, subRect.top), surface.pitch, destinationX + _workingWindow.left, destinationY + _workingWindow.top, subRect.width(), subRect.height());
    } else {
        _renderTable.mutateImage((uint16 *)surface.getPixels(), _workingWindowBuffer, surface.w, surface.h, destinationX, destinationY, subRect, wrap);

        _system->copyRectToScreen(_workingWindowBuffer, _workingWidth * sizeof(uint16), destinationX + _workingWindow.left, destinationY + _workingWindow.top, subRect.width(), subRect.height());
    }
}

So to walk through it:

  1. If destinationX/Y is less than 0, the image is off the screen to the left/top. Therefore get the top left corner of the subRect by subtracting destinationX/Y.
  2. If destinationX/Y is greater than the image width/height respectively, the image is off the screen to the right/bottom. Therefore get the top left corner of the subRect by adding destinationX/Y.
  3. If we’re wrapping and destinationX/Y is still positive at this point, it means that the image will be rendered like this:
  4. We want it to fully wrap, so we offset the image to the left one imageWidth, and then let mutateImage() take care of actually wrapping.

The last change to the render system was not due to a problem with the system, but due to a problem with the pixel format of the images. All images in Zork Nemesis and Zork Grand Inquisitor are encoded in RGB 555. However, a few of the ScummVM backends do not support RGB 555. Therefore, it was desirable to convert all images to RGB 565 on the fly. To do this, all image pixel data is first loaded into a Surface, then converted to RGB 565. After that, it is passed to renderSubRectToSurface().

Since I was alreadly preloading the pixel data into a Surface for RGB conversion, I figured that was a good place to do ‘un-transpose-ing’, rather than having to do it within mutateImage().

So, with all the changes, this is the current state of the render system:

  1. Read image pixel data from file and dump it into a Surface buffer. In the case of a background image, the surface buffer is stored so we only have to read the file once.
    void RenderManager::readImageToSurface(const Common::String &fileName, Graphics::Surface &destination) {
        Common::File file;
    
        if (!file.open(fileName)) {
            warning("Could not open file %s", fileName.c_str());
            return;
        }
    
        // Read the magic number
        // Some files are true TGA, while others are TGZ
        uint32 fileType = file.readUint32BE();
    
        uint32 imageWidth;
        uint32 imageHeight;
        Graphics::TGADecoder tga;
        uint16 *buffer;
        bool isTransposed = _renderTable.getRenderState() == RenderTable::PANORAMA;
        // All ZEngine images are in RGB 555
        Graphics::PixelFormat pixelFormat555 = Graphics::PixelFormat(2, 5, 5, 5, 0, 10, 5, 0, 0);
        destination.format = pixelFormat555;
    
        bool isTGZ;
    
        // Check for TGZ files
        if (fileType == MKTAG('T', 'G', 'Z', '\0')) {
            isTGZ = true;
    
            // TGZ files have a header and then Bitmap data that is compressed with LZSS
            uint32 decompressedSize = file.readSint32LE();
            imageWidth = file.readSint32LE();
            imageHeight = file.readSint32LE();
    
            LzssReadStream lzssStream(&file);
            buffer = (uint16 *)(new uint16[decompressedSize]);
            lzssStream.read(buffer, decompressedSize);
        } else {
            isTGZ = false;
    
            // Reset the cursor
            file.seek(0);
    
            // Decode
            if (!tga.loadStream(file)) {
                warning("Error while reading TGA image");
                return;
            }
    
            Graphics::Surface tgaSurface = *(tga.getSurface());
            imageWidth = tgaSurface.w;
            imageHeight = tgaSurface.h;
    
            buffer = (uint16 *)tgaSurface.getPixels();
        }
    
        // Flip the width and height if transposed
        if (isTransposed) {
            uint16 temp = imageHeight;
            imageHeight = imageWidth;
            imageWidth = temp;
        }
    
        // If the destination internal buffer is the same size as what we're copying into it,
        // there is no need to free() and re-create
        if (imageWidth != destination.w || imageHeight != destination.h) {
            destination.create(imageWidth, imageHeight, pixelFormat555);
        }
    
        // If transposed, 'un-transpose' the data while copying it to the destination
        // Otherwise, just do a simple copy
        if (isTransposed) {
            uint16 *dest = (uint16 *)destination.getPixels();
    
            for (uint32 y = 0; y < imageHeight; y++) {
                uint32 columnIndex = y * imageWidth;
    
                for (uint32 x = 0; x < imageWidth; x++) {
                    dest[columnIndex + x] = buffer[x * imageHeight + y];
                }
            }
        } else {
            memcpy(destination.getPixels(), buffer, imageWidth * imageHeight * _pixelFormat.bytesPerPixel);
        }
    
        // Cleanup
        if (isTGZ) {
            delete[] buffer;
        } else {
            tga.destroy();
        }
    
        // Convert in place to RGB 565 from RGB 555
        destination.convertToInPlace(_pixelFormat);
    }
    
  2. Use the ScriptManager to calculate the destination coordinates
  3. Call renderSubRectToScreen(surface, destinationX, destinationY, wrap)    (see above)
    1. If destinationX/Y is less than 0, the image is off the screen to the left/top. Therefore get the top left corner of the subRect by subtracting destinationX/Y.
    2. If destinationX/Y is greater than the image width/height respectively, the image is off the screen to the right/bottom. Therefore get the top left corner of the subRect by adding destinationX/Y.
    3. If we’re wrapping and destinationX/Y is still positive at this point, offset the image to the left one imageWidth
    4. If we’re in PANORAMA or TILT state, call mutateImage()     (see above)
      1. Iterate over the pixels of the subRect
      2. At each pixel get the coordinate offsets from the RenderTable
      3. Add the offsets to the coordinates of the pixel.
      4. Use these new coordinates to get the location of the pixel color
      5. Store this color at the coordinates of the original pixel
    5. Blit the final result to the Screen using OSystem::copyRectToScreen()

That’s it! Thanks for reading. As always, feel free to ask questions or make comments. Happy coding!

-RichieSams
Moving through time

Before I start, I know it’s been a long time since my last post. Over the next couple days I’m going to write a series of posts about what I’ve been working on these last two weeks. So without further ado, here is the first one:

While I was coding in the last couple of weeks, I noticed that every time I came back to the main game from a debug window, the whole window hung for a good 6 seconds. After looking at my run() loop for a bit, I realized what the problem was. When I returned from the debug window, the next frame would have a massive deltaTime, which in turn caused a huge frame delay. This was partially a problem with how I had structured my frame delay calculation, but in the end, I needed a way to know when the game was paused, and to modify my deltaTime value accordingly.

To solve the problem, I came up with a pretty simple Clock class that tracks time, allows pausing, (and if you really wanted scaling/reversing):

/* Class for handling frame to frame deltaTime while keeping track of time pauses/un-pauses */
class Clock {
public:
    Clock(OSystem *system);

private:
    OSystem *_system;
    uint32 _lastTime;
    int32 _deltaTime;
    uint32 _pausedTime;
    bool _paused;

public:
    /**
     * Updates _deltaTime with the difference between the current time and
     * when the last update() was called.
     */
    void update();
    /**
     * Get the delta time since the last frame. (The time between update() calls)
     *
     * @return    Delta time since the last frame (in milliseconds)
     */
    uint32 getDeltaTime() const { return _deltaTime; }
    /**
     * Get the time from the program starting to the last update() call
     *
     * @return Time from program start to last update() call (in milliseconds)
     */
    uint32 getLastMeasuredTime() { return _lastTime; }

    /**
     * Pause the clock. Any future delta times will take this pause into account.
     * Has no effect if the clock is already paused.    
     */
    void start();
    /**
     * Un-pause the clock.
     * Has no effect if the clock is already un-paused.    
     */
    void stop();
};

I’ll cover the guts of the functions in a bit, but first, here is their use in the main run() loop:

Common::Error ZEngine::run() {
    initialize();

    // Main loop
    while (!shouldQuit()) {
        _clock.update();
        uint32 currentTime = _clock.getLastMeasuredTime();
        uint32 deltaTime = _clock.getDeltaTime();

        processEvents();

        _scriptManager->update(deltaTime);
        _renderManager->update(deltaTime);

        // Update the screen
        _system->updateScreen();

        // Calculate the frame delay based off a desired frame time
        int delay = _desiredFrameTime - int32(_system->getMillis() - currentTime);
        // Ensure non-negative
        delay = delay < 0 ? 0 : delay;
        _system->delayMillis(delay);
    }

    return Common::kNoError;
}

And lastly, whenever the engine is paused (by a debug console, by the Global Main Menu, by a phone call, etc.), ScummVM core calls pauseEngineIntern(bool pause), which can be overridden to implement any engine internal pausing. In my case, I can call Clock::start()/stop()

void ZEngine::pauseEngineIntern(bool pause) {
    _mixer->pauseAll(pause);

    if (pause) {
        _clock.stop();
    } else {
        _clock.start();
    }
}

All the work of the class is done by update(). update() gets the current time using getMillis() and subtracts the last recorded time from it to get  _deltaTime. If the clock is currently paused, it subtracts off the amount of time that the clock has been paused. Lastly, it clamps the value to positive values.

void Clock::update() {
    uint32 currentTime = _system->getMillis();

    _deltaTime = (currentTime - _lastTime);
    if (_paused) {
        _deltaTime -= (currentTime - _pausedTime);
    }

    if (_deltaTime < 0) {
        _deltaTime = 0;
    }

    _lastTime = currentTime;
}

If you wanted to slow down or speed up time, it would be a simple matter to scale _deltaTime. You could even make it negative to make time go backwards. The full source code can be found here and here.

Well that’s it for this post. Next up is a post about the rendering system. Until then, happy coding!

-RichieSams
The making of psychedelic pictures (AKA, the panorama system)

In the game, the backgrounds are very long ‘circular’ images. By circular, I mean that if you were to put two copies of the same image end-to-end, they would be continuous. So, when the user moves around in the game, we just scroll the image accordingly. However, being that the images are flat, this movement isn’t very realistic; it would seem like you are continually moving sideways through an endless room. (Endless staircase memories anyone?)

To counter this, the makers of ZEngine created ‘ZVision’: they used trigonometry to warp the images on the screen so, to the user, it looked like you were truly spinning 360 degrees. So let’s dive into how exactly they did that.

The basic premise is mapping an image onto a cylinder and then mapping it back onto a flat plane. The math is all done once and stored into an offset lookup table. Then the table is referenced to warp the images.

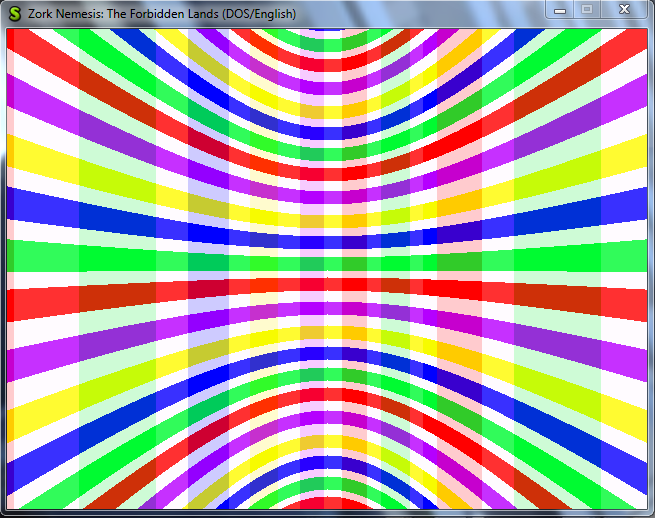
Without warping


With warping

You’ll notice that the images are pre-processed as though they were captured with a panorama camera.

Video example:

(Source: https://www.youtube.com/watch?v=aJxDZIqW_f4)

Here is the function for creating the panorama lookup table:

void RenderTable::generatePanoramaLookupTable() {
    memset(_internalBuffer, 0, _numRows * _numColumns * sizeof(uint16));

    float halfWidth = (float)_numColumns / 2.0f;
    float halfHeight = (float)_numRows / 2.0f;

    float fovRadians = (_panoramaOptions.fieldOfView * M_PI / 180.0f);
    float halfHeightOverTan = halfHeight / tan(fovRadians);
    float tanOverHalfHeight = tan(fovRadians) / halfHeight;

    for (uint x = 0; x < _numColumns; x++) {
        // Add an offset of 0.01 to overcome zero tan/atan issue (vertical line on half of screen)
        float temp = atan(tanOverHalfHeight * ((float)x - halfWidth + 0.01f));

        int32 newX = int32(floor((halfHeightOverTan * _panoramaOptions.linearScale * temp) + halfWidth));
        float cosX = cos(temp);

        for (uint y = 0; y < _numRows; y++) {
            int32 newY = int32(floor(halfHeight + ((float)y - halfHeight) * cosX));

            uint32 index = y * _numColumns + x;

            // Only store the x,y offsets instead of the absolute positions
            _internalBuffer[index].x = newX - x;
            _internalBuffer[index].y = newY - y;
        }
    }
}

I don’t quite understand all the math here, so at the moment it is just a cleaned-up version of what Marisa Chan had. If any of you would like to help me understand/clean up some of the math here I would be extremely grateful!

Putting aside the math for the time being, the function creates an (dx, dy) offset at each (x,y) coordinate. Or in other words, if we want the pixel located at (x,y), we should instead look at pixel (x + dx, y + dy). So to blit an image to the screen, we do this:

  1. Iterate though each pixel
  2. Use the (x,y) coordinates to look up a (dx, dy) offset in the lookup table
  3. Look up that pixel color in the source image at (x + dx, y + dy)
  4. Set that pixel in the destination image at (x,y)
  5. Blit the destination image to the screen using OSystem::copyRectToScreen()

Steps 1 – 4 are done in mutateImage()

void RenderTable::mutateImage(uint16 *sourceBuffer, uint16* destBuffer, uint32 imageWidth, uint32 imageHeight, Common::Rect subRectangle, Common::Rect destRectangle) {
    bool isTransposed = _renderState == RenderTable::PANORAMA

    for (int y = subRectangle.top; y < subRectangle.bottom; y++) {
        uint normalizedY = y - subRectangle.top;

        for (int x = subRectangle.left; x < subRectangle.right; x++) {
            uint normalizedX = x - subRectangle.left;

            uint32 index = (normalizedY + destRectangle.top) * _numColumns + (normalizedX + destRectangle.left);

            // RenderTable only stores offsets from the original coordinates
            uint32 sourceYIndex = y + _internalBuffer[index].y;
            uint32 sourceXIndex = x + _internalBuffer[index].x;

            // Clamp the yIndex to the size of the image
            sourceYIndex = CLIP<uint32>(sourceYIndex, 0, imageHeight - 1);

            // Clamp the xIndex to the size of the image
            sourceXIndex = CLIP<uint32>(sourceXIndex, 0, imageWidth - 1);

            if (isTransposed) {
                destBuffer[normalizedY * destRectangle.width() + normalizedX] = sourceBuffer[sourceXIndex * imageHeight + sourceYIndex];
            } else {
                destBuffer[normalizedY * destRectangle.width() + normalizedX] = sourceBuffer[sourceYIndex * imageWidth + sourceXIndex];
            }
        }
    }
}


  • Since the whole image can’t fit on the screen, we iterate over a subRectangle of the image instead of the whole width/height.
  • destRectangle refers to where the image will be placed on the screen. It is in screen space, so we use it to offset the image coordinates in the lookup table (line 10).
  • We clip the coordinates to the height/width of the image to ensure no “index out of range” exceptions.

You may have noticed the last bit of code hinted at panoramas being transposed. For some reason, the developers chose to store panorama image data transposed. (Perhaps it made their math easier?) By transposed, I mean a pixel (x,y) in the true image would instead be stored at (y, x). Also the image height and width would be swapped. So an image that is truly 1440×320 would instead be 320×1440. If you have any insights into this, I’m all ears. Swapping x and y in code was trivial enough though. I would like to note that prior to calling mutateImage, I check if the image is a panorama, and if so, swap the width and height. So the imageWidth and imageHeight in the function are the width/height of the true image, not of the actual source image. This code that does the swap can be found in the function RenderManager::renderSubRectToScreen.

Well, that’s it for now. My next goal is to get the majority of the events working so I can load a room and the background image, music, etc. load automatically. So until next time, happy coding!

-RichieSams
“One person’s data is another person’s noise.”

I know it’s been forever since I’ve done a post and I’m really sorry. I got caught up in the sound issues and panorama issues. I’m going to talk about sound in this post and then make another post about panoramas. So here we go!

“One person’s data is another person’s noise.”  ― K.C. Cole

This quote pretty much sums up my experiences with the sound decoding. I was somewhat lucky in that Marisa Chan’s source code had an implementation of sound decoding that I could model off of, but at the same time, the whole function was quite cryptic. This is mostly due to the variable “naming”. And I say “naming” in the loosest sense of the word, because most were single letters:

void adpcm8_decode(void *in, void *out, int8_t stereo, int32_t n)
{
    uint8_t *m1;
    uint16_t *m2;
    m1 = (uint8_t *)in;
    m2 = (uint16_t *)out;
    uint32_t a, x, j = 0;
    int32_t b, i, t[4] = {0, 0, 0, 0};

    while (n)
    {
        a = *m1;
        i = t[j+2];
        x = t2[i];
        b = 0;

        if(a & 0x40)
            b += x;
        if(a & 0x20)
            b += x >> 1;
        if(a & 0x10)
            b += x >> 2;
        if(a & 8)
            b += x >> 3;
        if(a & 4)
            b += x >> 4;
        if(a & 2)
            b += x >> 5;
        if(a & 1)
            b += x >> 6;

        if(a & 0x80)
            b = -b;

        b += t[j];

        if(b > 32767)
            b = 32767;
        else if(b < -32768)
            b = -32768;

        i += t1[(a >> 4) & 7];

        if(i < 0)
            i = 0;
        else if(i > 88)
            i = 88;

        t[j] = b;
        t[j+2] = i;
        j = (j + 1) & stereo;
        *m2 = b;

        m1++;
        m2++;
        n--;
    }
}

No offense intended towards Marisa Chan, but that makes my eyes hurt. It made understanding the algorithm that much harder. But after talking to a couple people at ScummVM and Wikipedia-ing general sound decoding, I figured out the sound is encoded using a modified Microsoft Adaptive PCM. I’ll go ahead and post my implementation and then describe the process:

const int16 RawZorkStream::_stepAdjustmentTable[8] = {-1, -1, -1, 1, 4, 7, 10, 12};

const int32 RawZorkStream::_amplitudeLookupTable[89] = {0x0007, 0x0008, 0x0009, 0x000A, 0x000B, 0x000C, 0x000D, 0x000E,
                                                        0x0010, 0x0011, 0x0013, 0x0015, 0x0017, 0x0019, 0x001C, 0x001F,
                                                        0x0022, 0x0025, 0x0029, 0x002D, 0x0032, 0x0037, 0x003C, 0x0042,
                                                        0x0049, 0x0050, 0x0058, 0x0061, 0x006B, 0x0076, 0x0082, 0x008F,
                                                        0x009D, 0x00AD, 0x00BE, 0x00D1, 0x00E6, 0x00FD, 0x0117, 0x0133, 
                                                        0x0151, 0x0173, 0x0198, 0x01C1, 0x01EE, 0x0220, 0x0256, 0x0292,
                                                        0x02D4, 0x031C, 0x036C, 0x03C3, 0x0424, 0x048E, 0x0502, 0x0583, 
                                                        0x0610, 0x06AB, 0x0756, 0x0812, 0x08E0, 0x09C3, 0x0ABD, 0x0BD0,
                                                        0x0CFF, 0x0E4C, 0x0FBA, 0x114C, 0x1307, 0x14EE, 0x1706, 0x1954, 
                                                        0x1BDC, 0x1EA5, 0x21B6, 0x2515, 0x28CA, 0x2CDF, 0x315B, 0x364B,
                                                        0x3BB9, 0x41B2, 0x4844, 0x4F7E, 0x5771, 0x602F, 0x69CE, 0x7462, 0x7FFF};

int RawZorkStream::readBuffer(int16 *buffer, const int numSamples) {
    uint32 bytesRead = 0;

    // 0: Left, 1: Right
    byte channel = 0;

    while (bytesRead < numSamples) {
        byte encodedSample = _stream->readByte();
        if (_stream->eos()) {
            _endOfData = true;
            return bytesRead;
        }
        bytesRead++;

        int16 index = _lastSample[channel].index;
        uint32 lookUpSample = _amplitudeLookupTable[index];

        int32 sample = 0;

        if (encodedSample & 0x40)
            sample += lookUpSample;
        if (encodedSample & 0x20)
            sample += lookUpSample >> 1;
        if (encodedSample & 0x10)
            sample += lookUpSample >> 2;
        if (encodedSample & 8)
            sample += lookUpSample >> 3;
        if (encodedSample & 4)
            sample += lookUpSample >> 4;
        if (encodedSample & 2)
            sample += lookUpSample >> 5;
        if (encodedSample & 1)
            sample += lookUpSample >> 6;
        if (encodedSample & 0x80)
            sample = -sample;

        sample += _lastSample[channel].sample;
        sample = CLIP(sample, -32768, 32767);

        buffer[bytesRead - 1] = (int16)sample;

        index += _stepAdjustmentTable[(encodedSample >> 4) & 7];
        index = CLIP<int16>(index, 0, 88);

        _lastSample[channel].sample = sample;
        _lastSample[channel].index = index;

        // Increment and wrap the channel
        channel = (channel + 1) & _stereo;
    }

    return bytesRead;
}

Each sample is encoded into 8 bits. The actual sound sample is read from the bits using a lookup table and an index from the previous ‘frame’. This is then added to the sample from last ‘frame’. Finally, the 4 high bits are used to set the index for the next ‘frame’.

The biggest problem I ran into for sound was actually a typo on my part. The template argument for CLIP was accidentally set to a uint16 instead of a int16. This caused distortions at the extremely high and low ranges of the sound. But, this usually only occurred at the beginning and end of a sound clip. I spent days trying to figure out if I had set the initial lastSample correctly, or other random ideas. After pounding my head into the desk for 3 days, the glorious wjp came along and found my typo. After which, the sound worked perfectly. Shout out to wjp!!!!!!!!!

There is one other bug with sound and that’s in videos. The sound has a slight ‘ticking’. However, clone2727 identified it potentially as a problem with the AVI decoder. In the current state, the AVI decoder puts each sound ‘chunk’ into its own AudioStream, and then puts all the streams into a queue to be played. We’re thinking the lastSample needs to persist from chunk to chunk. However, solving this problem would take either a gross hack, or a redesign of the AVI decoder. clone2727 has taken on the task, so I’m going to leave it to him and get back to the video audio later in the project.

Well, that’s it for this post. Sound was pretty straightforward. I was only bogged down due to some really bad typos on my part. As always, feel free to comment or ask questions.

-RichieSams

The Engine Skeleton Gains Some Tendons – Part 2

Part 2!! As a recap from last post, I started out last week by implementing image handling, video handling, and a text debug console.

I started with the console as it allows me to to map typed commands to functions. (IE. ‘loadimage zassets/castle/cae4d311.tga’ calls loadImageToScreen() on that file) This is extremely useful in that I can load an image multiple times or I can load different images all without having to re-run the engine or recompile.

Creating the text console was actually extremely easy because it was already written. I just to inherit from the base class:

class Console : public GUI::Debugger {
public:
    Console(ZEngine *engine);
    virtual ~Console() {}

private:
    ZEngine *_engine;

    bool cmdLoadImage(int argc, const char **argv);
    bool cmdLoadVideo(int argc, const char **argv);
    bool cmdLoadSound(int argc, const char **argv);
};

In the constructor, I just registered the various commands:

Console::Console(ZEngine *engine) : GUI::Debugger(), _engine(engine) {
    DCmd_Register("loadimage", WRAP_METHOD(Console, cmdLoadImage));
    DCmd_Register("loadvideo", WRAP_METHOD(Console, cmdLoadVideo));
    DCmd_Register("loadsound", WRAP_METHOD(Console, cmdLoadSound));
}

And then, in ZEngine::initialize() I created an instance of my custom class:

void ZEngine::initialize() {
        .
        .
        .

    _console = new Console(this);
}

And lastly, I registered a key press combination to bring up the debug console

void ZEngine::processEvents() {
    while (_eventMan->pollEvent(_event)) {
        switch (_event.type) {
        case Common::EVENT_KEYDOWN:
            switch (_event.kbd.keycode) {
            case Common::KEYCODE_d:
                if (_event.kbd.hasFlags(Common::KBD_CTRL)) {
                    // Start the debugger
                    _console->attach();
                    _console->onFrame();
                }
                break;
            }
            break;
        }
    }
}

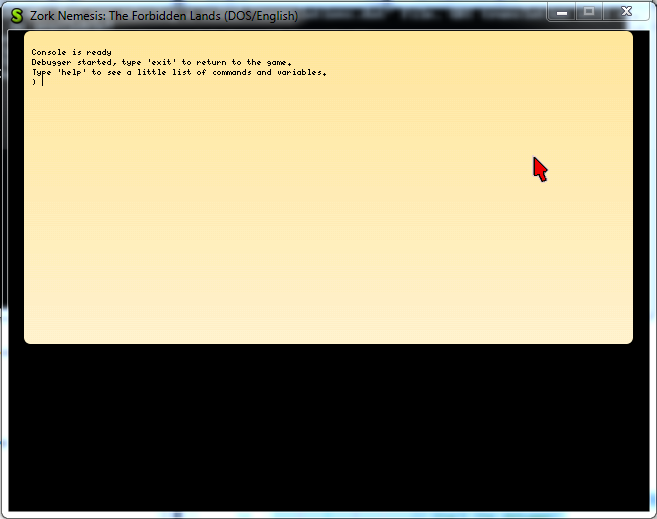
With that done, I can press ctrl+d, and this is what pops up:

Awesome! With that done, I could move on to images. All the images in ZNem and ZGI are .tga files, but don’t be fooled; the vast majority of them aren’t actually TGA. They’re actually TGZ, a custom image format. The format itself isn’t too difficult, and I give all the credit to Mr. Mouse on Xentax.

Byte[4] "TGZ\0"
uint32 Original size of bitmap data
uint32 Width of image
uint32 Heigth of image
Byte[n] Bitmap data (LZSS compressed)

I could have created a class for decoding TGZ, but with it being that simple, I just chose to integrate the decoding in the renderImageToScreen method:

void ZEngine::renderImageToScreen(const Common::String &fileName, uint32 x, uint32 y) {
    Common::File file;

    if (!file.open(fileName)) {
        error("Could not open file %s", fileName.c_str());
        return;
    }

    // Read the magic number
    // Some files are true TGA, while others are TGZ
    char fileType[4];
    file.read(fileType, 4);

    // Check for TGZ files
    if (fileType[0] == 'T' && fileType[1] == 'G' && fileType[2] == 'Z' && fileType[3] == '\0') {
        // TGZ files have a header and then Bitmap data that is compressed with LZSS
        uint32 decompressedSize = file.readSint32LE();
        uint32 width = file.readSint32LE();
        uint32 height = file.readSint32LE();

        LzssReadStream stream(&file);
        byte *buffer = new byte[decompressedSize];
        stream.read(buffer, decompressedSize);

        _system->copyRectToScreen(buffer, width * 2, x, y, width, height);
    } else {
        // Reset the cursor
        file.seek(0);

        // Decode
        Graphics::TGADecoder tga;
        if (!tga.loadStream(file)) {
            error("Error while reading TGA image");
            return;
        }

        const Graphics::Surface *tgaSurface = tga.getSurface();
        _system->copyRectToScreen(tgaSurface->pixels, tgaSurface->pitch, x, y, tgaSurface->w, tgaSurface->h);

        tga.destroy();
    }

    _needsScreenUpdate = true;
}

So after using the loadimage command in the console, we get a wonderful picture on the screen:

Video!! Implementing the image aspect of video was rather trivial, as ZEngine uses a standard AVI format. The only ‘wrinkle’ was that the videos used a different PixelFormat. Every other part of the engine uses RGB 555, but videos use RGB 565. However, when a video is playing, it’s only thing going on. So, I can reinitialize the graphics to RGB 565 before playing a video, and reset it back to RGB 555 when the video finishes:

void ZEngine::startVideo(Video::VideoDecoder *videoDecoder) {
    if (!videoDecoder)
        return;

    _currentVideo = videoDecoder;

    Common::List formats;
    formats.push_back(videoDecoder->getPixelFormat());
    initGraphics(_width, _height, true, formats);
           .
           .
           .
}
void ZEngine::continueVideo() {
           .
           .
           .

    if (!_currentVideo->endOfVideo()) {
        // Code to render the current frame
    } else {
        initGraphics(_width, _height, true, &_pixelFormat);
        delete _currentVideo;
        _currentVideo = 0;
        delete _scaledVideoFrameBuffer;
        _scaledVideoFrameBuffer = 0;
    }
}

Where _pixelFormat is a const PixelFormat member variable of the ZEngine class.

One other slight wrinkle is that the video is at a resolution of 256 x 160, which is quite small if I do say so myself. To fix that, I used a linear 2x scaler that [md5] wrote and scaled every frame. Using the opening cinematic as an example, we get this:

However, the sound in video is messed up, and it’s actually been what I’ve been working on this week, but I’ll save that for another post.

I’m now two steps closer to getting all the parts of the engine implemented and somewhat tied together. As always, if you have an suggestions or comments, feel free to comment below.

-RichieSams

The Engine Skeleton Gains Some Tendons – Part 1

Being a little tired of the script system, I started last week by adding image handling, video handling and a text debug console to the engine. With that done, I tried piecing together how the script system worked as a whole. After a long talk with Fuzzie, we figured out the majority of the system worked and I’ve spent the beginning of this week putting it into code.

I’ll start with the script system since it’s fresh in my mind. Rather than try to explain what I learned, I’ll just explain my current understanding of the system and it’s behavior.

The system is governed by five main containers:

Common::HashMap<uint32, byte> _globalState;

Common::List<ActionNode *> _activeNodes;

Common::HashMap<uint32, Common::Array<Puzzle *>> _referenceTable;

Common::Stack<Puzzle *> _puzzlesToCheck;

Common::List<Puzzle> _activePuzzles;

Common::List<Control> _activeControls;

_globalState holds the state of the entire game. Each key is a hash that can represent anything from a timer to whether a certain puzzle has been solved. The value depends on the what the key is, however, the vast majority are boolean states (0 or 1).

_activeNodes holds… wait for it… the active ActionNodes. Imagine that! Nodes are anything that needs to be processed over time. For example, a timer, an animation, etc. I’ll explain further later in the post.

_referenceTable stores references to the Puzzles that certain globalState keys have. This can be thought of as a reverse of the Puzzle struct. A Puzzle stores a list of globalState keys to be checked. _referenceTable stores which Puzzles reference certain globalState keys. Why would we want to do this? It means that any puzzles loaded into the _reference table only have to be checked once, instead of every frame. When a value in _globalState is changed, it adds the referenced Puzzle to _puzzlesToCheck

_puzzlesToCheck holds the Puzzles whose Criteria we want to check against _globalState. This stack is exhausted every frame. It is filled either by _referenceTable or when we enter a new room.

_activePuzzles is where the room’s Puzzles are stored. The Puzzle pointers in _referenceTable and _puzzlesToCheck point to here.

I realize that the descriptions are still a bit vague, so I figured I would go through an example of sorts and how the containers behave.

Every time we change rooms:

  1. Clear _referenceTable, _puzzlesToCheck, and _activePuzzles
  2. Open and parse the corresponding .scr file into Puzzle structs and store them in _activePuzzles. (See last three blog posts)
  3. Iterate through all the Puzzles and their Criteria and create references from a globalState key to the Puzzle. (See createReferenceTable below)
  4. Add all Puzzles to _puzzlesToCheck
void ScriptManager::createReferenceTable() {
    // Iterate through each Puzzle
    for (Common::List<Puzzle>::iterator activePuzzleIter = _activePuzzles.begin(); activePuzzleIter != _activePuzzles.end(); activePuzzleIter++) {
        Puzzle *puzzlePtr = &(*activePuzzleIter);

        // Iterate through each Criteria and add a reference from the criteria key to the Puzzle
        for (Common::List<Criteria>::iterator criteriaIter = activePuzzleIter->criteriaList.begin(); criteriaIter != (*activePuzzleIter).criteriaList.end(); criteriaIter++) {
            _referenceTable[criteriaIter->key].push_back(puzzlePtr);

            // If the argument is a key, add a reference to it as well
            if (criteriaIter->argument)
                _referenceTable[criteriaIter->argument].push_back(puzzlePtr);
        }
    }

    // Remove duplicate entries
    for (Common::HashMap<uint32, Common::Array<Puzzle *>>::iterator referenceTableIter; referenceTableIter != _referenceTable.end(); referenceTableIter++) {
        removeDuplicateEntries(&(referenceTableIter->_value));
    }
}

Every frame:

  1. Iterate through each ActionNode in _activeNodes and call process() on them
  2. If process() returns true, remove and delete the ActionNode
void ScriptManager::updateNodes(uint32 deltaTimeMillis) {
    // If process() returns true, it means the node can be deleted
    for (Common::List<ActionNode *>::iterator iter = _activeNodes.begin(); iter != _activeNodes.end();) {
        if ((*iter)->process(_engine, deltaTimeMillis)) {
            // Remove the node from _activeNodes, then delete it
            ActionNode *node = *iter;
            iter = _activeNodes.erase(iter);
            delete node;
        } else {
            iter++;
        }
    }
}
bool NodeTimer::process(ZEngine *engine, uint32 deltaTimeInMillis) {
    _timeLeft -= deltaTimeInMillis;

    if (_timeLeft <= 0) {
        engine->getScriptManager()->setStateValue(_key, 0);
        return true;
    }

    return false;
}


  1. While _puzzlesToCheck is not empty, pop a Puzzle off the stack and check its Criteria against _globalState
  2. If any of the Criteria pass, call execute() on the corresponding ResultAction.
    • Some ResultAction’s might create ActionNode’s and add them to _activeNodes. IE ActionTimer


void ScriptManager::checkPuzzleCriteria() {
    while (!_puzzlesToCheck.empty()) {
        Puzzle *puzzle = _puzzlesToCheck.pop();
        // Check each Criteria
        for (Common::List<Criteria>::iterator iter = puzzle->criteriaList.begin(); iter != puzzle->criteriaList.end(); iter++) {
            bool criteriaMet = false;

            // Get the value to compare against
            byte argumentValue;
            if ((*iter).argument)
                argumentValue = getStateValue(iter->argument);
            else
                argumentValue = iter->argument;

            // Do the comparison
            switch ((*iter).criteriaOperator) {
            case EQUAL_TO:
                criteriaMet = getStateValue(iter->key) == argumentValue;
                break;
            case NOT_EQUAL_TO:
                criteriaMet = getStateValue(iter->key) != argumentValue;
                break;
            case GREATER_THAN:
                criteriaMet = getStateValue(iter->key) > argumentValue;
                break;
            case LESS_THAN:
                criteriaMet = getStateValue(iter->key) < argumentValue;
                break;
            }

            // TODO: Add logic for the different Flags (aka, ONCE_PER_INST)
            if (criteriaMet) {
                for (Common::List<ResultAction *>::iterator resultIter = puzzle->resultActions.begin(); resultIter != puzzle->resultActions.end(); resultIter++) {
                    (*resultIter)->execute(_engine);
                }
            }
        }
    }
}
bool ActionTimer::execute(ZEngine *zEngine) {
    zEngine->getScriptManager()->addActionNode(new NodeTimer(_key, _time));
    return true;
}

So that’s the script system. I’ve tried to explain it in the best way possible, but if you guys have any questions or suggestions for my implementation, as always, feel free to comment.

Details on the image handling, video handling and the text debug console will be in Part 2, which should be up some time tomorrow. As always, thanks for reading. 🙂

-RichieSams

Improving the ‘Object’ class (including renaming it) and using classes for ResultActions

Last week, I posted about using an ‘Object’ class to encapsulate the variable-typed arguments for ResultActions. You guys posted some awesome feedback and I used it to improve the class. First, I renamed the class to ‘SingleValueContainer’ so users have a better sense of what it is. Second, following Fuzzie’s advice, I put all the values except for String, directly in the union. It’s the same or less memory cost and results in less heap allocations.

union {
    bool boolVal;
    byte byteVal;
    int16 int16Val;
    uint16 uint16Val;
    int32 int32Val;
    uint32 uint32Val;
    float floatVal;
    double doubleVal;
    char *stringVal;
} _value;

You’ll notice that the stringVal isn’t actually a Common::String object, but rather a pointer to a char array. This saves a bit of memory at the cost of a couple strlen(), memcpy(), and String object assigment.

SingleValueContainer::SingleValueContainer(Common::String value) : _objectType(BYTE) {
    _value.stringVal = new char[value.size() + 1];
    memcpy(_value.stringVal, value.c_str(), value.size() + 1);
}
SingleValueContainer &SingleValueContainer::operator=(const Common::String &rhs) {
    if (_objectType != STRING) {
        _objectType = STRING;
        _value.stringVal = new char[rhs.size() + 1];
        memcpy(_value.stringVal, rhs.c_str(), rhs.size() + 1);

        return *this;
    }

    uint32 length = strlen(_value.stringVal);
    if (length <= rhs.size() + 1) {
        memcpy(_value.stringVal, rhs.c_str(), rhs.size() + 1);
    } else {
        delete[] _value.stringVal;
        _value.stringVal = new char[rhs.size() + 1];
        memcpy(_value.stringVal, rhs.c_str(), rhs.size() + 1);
    }

    return *this;
}
bool SingleValueContainer::getStringValue(Common::String *returnValue) const {
    if (_objectType !=  STRING)
        warning("'Object' is not storing a Common::String.");

    *returnValue = _value.stringVal;
    return true;
}

With those changes the class seems quite solid. (The full source can be found here and here). However, after seeing Zidane Sama’s comment, I realized that there was a better way to tackle the problem than variant objects. Instead of trying to generalize the action types and arguments and storing them in structs, a better approach is to create a class for each action type with a common, “execute()” method that will be called by the scriptManager when the Criteria are met for an ResultAction.

I first created an interface base class that all the different types would inherit from:

class ResultAction {
public:
    virtual ~ResultAction() {}
    virtual bool execute(ZEngine *zEngine) = 0;
};

Next, I created the individual classes for each type of ResultAction:

class ActionAdd : public ResultAction {
public:
    ActionAdd(Common::String line);
    bool execute(ZEngine *zEngine);

private:
    uint32 _key;
    byte _value;
};

The individual classes parse out any arguments in their constructor and store them in member variables. In execute(), they execute the logic pertaining to their action. A pointer to ZEngine is passed in order to give the method access to all the necessary tools (modifying graphics, scriptManager states, sounds, etc.)

class ResultAction {
ActionAdd::ActionAdd(Common::String line) {
    sscanf(line.c_str(), ":add(%u,%hhu)", &_key, &_value);
}

bool ActionAdd::execute(ZEngine *zEngine) {
    zEngine->getScriptManager()->addToStateValue(_key, _value);
    return true;
}

Thus, in the script file parser I can just look for the action type and then pass create an action type, passing the constructor the whole line:

while (!line.contains('}')) {
    // Parse for the action type
    if (line.matchString("*:add*", true)) {
        actionList.push_back(ActionAdd(line));
    } else if (line.matchString("*:animplay*", true)) {
        actionList.push_back(ActionAnimPlay(line));
    } else if (.....)
         .
         .
         .
}

While this means I have to create 20+ classes for all the different types of actions, I think this method nicely encapsulates and abstracts both the parsing and the action of the result.

I’m a bit sad that I’m not going to be using the ‘SingleValueContainer’ class, but if nothing else, I learned quite a bit while creating it. Plus, I won’t be getting rid of it, so it might have a use somewhere else.

This coming week I need to finish creating all the classes and then try to finish the rest of the engine skeleton. As always, feel free to comment / ask questions.

-RichieSams

Implementing a generic single value container in c++

In my previous post I explained the format of the script system for ZEngine. Each Puzzle has a Results section which essentially stores function names and their arguments:

results {
    action:assign(5985, 0)
    background:timer:7336(60)
    event:change_location(C,B,C0,1073)
    background:music:5252(1 a000h1tc.raw 1)    
}

I wanted to be able to store each action inside a struct, and then have a linked list of all the structs. However, the problem is that both the number of arguments and the size of the arguments are variable. Marisa Chan’s solution was to store all the arguments in a space delimited char array. IE:

char arguments[25] = "1 a00h1tc.raw 1";

Simple, but not without it’s problems.

  1. Since the char array is in a struct, the size is fixed. In order to make sure we never overflow, we have to allocate a fairly large array. That said, in this particular case, each ‘large’ array in this case would only be ~30 bytes per struct.
  2. By storing everything as strings, we put off parsing till the action function is actually called. At first glace, this doesn’t seem too bad, since the data will have to be parsed anyway. However, this method forces it to be parsed at every call to that action function.

Another option was to have everything stored in a linked list of void pointers. However, I don’t think I need to convince anyone that void pointers are just gross and using them would be just asking for problems.

What I really wanted was a typed way to store a variably typed (and sized) value. Therefore I created what I’m calling the “Object” class. (I’m up for suggestions for a better name)

The heart of the class is a union that stores a variety of pointers to different types and an enum that defines what type is being stored:

class Object {
public:
    enum ObjectType : byte {
        BOOL,
        BYTE,
        INT16,
        UINT16,
        INT32,
        UINT32,
        FLOAT,
        DOUBLE,
        STRING,
    };

private:
    ObjectType _objectType;

    union {
        bool *boolVal;
        byte *byteVal;
        int16 *int16Val;
        uint16 *uint16Val;
        int32 *int32Val;
        uint32 *uint32Val;
        float *floatVal;
        double *doubleVal;
        Common::String *stringVal;
    } _value;
}

_objectType keeps track of what type of data the object is storing and _value points to the actual data. If _value were instead to hold the actual data value, the union would be forced to sizeof(Common::String), which is quite large (~34 bytes), due to internal caching. Then we’re back to the argument of storing things in containers much larger than what they need. By putting the data on the heap and only storing pointers to the data, we save the wasted space, but at the CPU cost of heap allocation.

Now that the data is stored, how do we get it back? My original idea was to have implicit cast operators:

operator bool();
operator byte();
operator int16();
      .
      .
      .

However, LordHoto, one of the GSoC mentors and ScummVM developers, brought my attention to the problems that can arise when using implicit casting. For example, a user could try to cast the data to a type that wasn’t stored in the Object and the cast would work, but the data would be completely corrupted. Also, from a user point of view, it wasn’t intuitive.

Therefore, I removed the cast operators and created accessor methods:

bool getBoolValue(bool *returnValue) const;
bool getByteValue(byte *returnValue) const;
bool getInt16Value(int16 *returnValue) const;
           .
           .
           .


bool Object::getBoolValue(bool *returnValue) const {
    if (_objectType !=  BOOL) {
        warning("'Object' not of type bool.");
        return false;
    }

    *returnValue = *_value.boolVal;
    return true;
}

This adds a layer of type semi-protection to the class.

Lastly, I added assigment operators to the class, but rather than making this post even longer, I’ll just link the full source here and here.

Advantages of ‘Object’ class

  • Can store relatively ‘any’ type of data. (Any type not currently supported could be trivially added)
  • Only uses as much space as needed.
  • Transforms dynamically typed data into a statically typed ‘box’ that can be stored in arrays, linked lists, hashmaps, etc. and can be iterated upon

Disadvantages of ‘Object’ class

  • Adds a small memory overhead per object. ( 1 byte + sizeof(Operating System pointer) )
  • Adds one heap memory allocation per object

So is it better than Marisa Chan’s implementation? It really depends on what you define as better. While it does save memory, only requires data to be parsed once, and, in my opinion, adds a great deal of elegance to handling the Results arguments, it does so at the cost of heap storage. Not only the cost of the initial allocation, but the cost of potential defragmentation runs. But then again, is the cost of heap storage really that big, especially since the data should have a relatively long life? (On average, the time an end user spends in a room in the game) That I don’t know, since it all depends on the memory allocator implementation.

In the end, I believe both methods perform well, and as such I choose the eloquence of using the ‘Object’ class. I am very much open to your thoughts on both the class as a whole or on your take of the problem. Also, if I misspoke about something please, please, please let me know.

Thanks for reading and have fun coding,
-RichieSams

Edit: Upon further inspection I noticed that by using Common::String I’m not only negating any memory size benefits from using ‘Object’, but potentially even using more memory, since Common::String has such a huge size.

Marisa Chan:
char arguments[25] = "1 a00h1tc.raw 1";
size = 25;

Object:
Object arg1 = 1;
Object arg2 = "a00h1tc.raw";
Object arg3 = 1;

size = (3 *sizeof(Object)) + sizeof(byte) + sizeof(Common::String) + sizeof(byte);
size = 15 + 1 + 34 + 1;
size = 51;

I could instead store the data in a char array, but it would mean that the Object class would need a stringLength member, which adds another 1 – 4 bytes on every instance of the class. Even with this new insight, I think I will continue to use ‘Object’, again for the added eloquence it adds. The memory difference is still rather small.